5
More Annotations


2


1
Favourite Annotations


6


4
Text
LEARN CLIP STUDIO PAINT An Introduction to Clip Studio Assets. Clip Studio Assets is the new way of finding and downloading new materials, brushes, etc. for Clip Studio Paint. In this video, I'll show you how. ADD COPIC MARKERS TO YOUR TOOLKIT Copic Markers. I can offer you three choices for your Copic Marker brush needs: The Daub Marker set gives you a bunch of brushes which emulate both Copic Markers and Tombow markers. The set costs 2.50 Euros, which is still less than $3 American. It includes wet and dry Copic brush tips, and even a brush to emulate dried out markers. 10 SITES WITH FREE FONTS FOR LETTERING YOUR COMICS A Mind Numbing Overwhelming Host of Free Fonts. 613 fonts for free classified as “Comic Book Fonts”, including Blambot’s stuff: Some stretch the definition of “Comic Book Font,” though. Blambot has a few free fonts listed. Look for the “F” in a word balloon next to the font name. 1001Fonts has 448 free fonts at FontSpace. HOW TO ADD A BRUSH (OR PEN OR PENCIL) You have to open a Finder window on the screen. Here’s where you can CTRL-click individual brushes, or just shift-click to highlight a bunch that are already in a row. Then, click back to Clip Studio Paint. Now, drag and drop that brush or bunch of brushes to an empty spot in the tab where you want to add them.
UNDO LIKE A PRO
Mistakes are inevitable. One of the best things about drawing digitally, though, is that you can undo your mistakes. You are already familiar with the power of CMD-Z (CTRL-Z on Windows) from a lifetime of computer use, I’m sure. It works the same way in Clip Studio Paint. CSP remembers a bunch of your most recent commands and artistic flourishes. You can usually step back in time a few stepsSIX WAYS TO ZOOM
The first is the standard slide to the left and right to zoom in and out. 4. The Zoom Tool – Draw a Rectangle. This one is handy when you want to fill the whole screen with a known particular area. Draw a rectangle around that area and it will fill the screen, no matter what zoom level it takes. 5. 30 SETS OF FREE BRUSHES YOU CAN DOWNLOAD NOW! Everybody loves to play with brushes in Clip Studio Paint. Today, I’ve compiled 30 different sets of brushes you can download for free from various places on the web.. I’m not making any claims as to how good these brushes are or how best to use them.THE BLUE LINE TRICK
This is the simplest solution, and the recommended one. Clip Studio Paint has a tool built in to deal with blue line layers. Choose the layer you want to turn into blue line art and go to the Layer Property tab, which should be (by default) in the window just above the layers window. Check the blue square to turn all your imagery on that layer HOW TO FLIP AN IMAGE If you’re on a Mac, click the “CLIP STUDIO PAINT” item in the upper left corner of the OS X title bar. Click on “Shortcut Settings.”. In the “Setting Area” dropdown box, choose “Main Menu.”. Then click on the same sequence as you did in the menu bar before. View –> Rotate/Invert –> Flip Horizontal. 8 KEYBOARD SHORTCUTS TO CLIP STUDIO PAINT HAPPINESS The place to change the shortcuts is the “Shortcut Settings” menu, which you can find on a Mac in the upper left corner of your screen under the “CLIP STUDIO PAINT” dropdown. There is a shortcut for the shortcuts. It’ll take four fingers, thoughu000bu000b: Shift-CMD-OPTION-K. (Of course.) From there, just drill down on thelists until
LEARN CLIP STUDIO PAINT An Introduction to Clip Studio Assets. Clip Studio Assets is the new way of finding and downloading new materials, brushes, etc. for Clip Studio Paint. In this video, I'll show you how. ADD COPIC MARKERS TO YOUR TOOLKIT Copic Markers. I can offer you three choices for your Copic Marker brush needs: The Daub Marker set gives you a bunch of brushes which emulate both Copic Markers and Tombow markers. The set costs 2.50 Euros, which is still less than $3 American. It includes wet and dry Copic brush tips, and even a brush to emulate dried out markers. 10 SITES WITH FREE FONTS FOR LETTERING YOUR COMICS A Mind Numbing Overwhelming Host of Free Fonts. 613 fonts for free classified as “Comic Book Fonts”, including Blambot’s stuff: Some stretch the definition of “Comic Book Font,” though. Blambot has a few free fonts listed. Look for the “F” in a word balloon next to the font name. 1001Fonts has 448 free fonts at FontSpace. HOW TO ADD A BRUSH (OR PEN OR PENCIL) You have to open a Finder window on the screen. Here’s where you can CTRL-click individual brushes, or just shift-click to highlight a bunch that are already in a row. Then, click back to Clip Studio Paint. Now, drag and drop that brush or bunch of brushes to an empty spot in the tab where you want to add them.UNDO LIKE A PRO
Mistakes are inevitable. One of the best things about drawing digitally, though, is that you can undo your mistakes. You are already familiar with the power of CMD-Z (CTRL-Z on Windows) from a lifetime of computer use, I’m sure. It works the same way in Clip Studio Paint. CSP remembers a bunch of your most recent commands and artistic flourishes. You can usually step back in time a few stepsSIX WAYS TO ZOOM
The first is the standard slide to the left and right to zoom in and out. 4. The Zoom Tool – Draw a Rectangle. This one is handy when you want to fill the whole screen with a known particular area. Draw a rectangle around that area and it will fill the screen, no matter what zoom level it takes. 5. 30 SETS OF FREE BRUSHES YOU CAN DOWNLOAD NOW! Everybody loves to play with brushes in Clip Studio Paint. Today, I’ve compiled 30 different sets of brushes you can download for free from various places on the web.. I’m not making any claims as to how good these brushes are or how best to use them.THE BLUE LINE TRICK
This is the simplest solution, and the recommended one. Clip Studio Paint has a tool built in to deal with blue line layers. Choose the layer you want to turn into blue line art and go to the Layer Property tab, which should be (by default) in the window just above the layers window. Check the blue square to turn all your imagery on that layer HOW TO FLIP AN IMAGE If you’re on a Mac, click the “CLIP STUDIO PAINT” item in the upper left corner of the OS X title bar. Click on “Shortcut Settings.”. In the “Setting Area” dropdown box, choose “Main Menu.”. Then click on the same sequence as you did in the menu bar before. View –> Rotate/Invert –> Flip Horizontal. 8 KEYBOARD SHORTCUTS TO CLIP STUDIO PAINT HAPPINESS The place to change the shortcuts is the “Shortcut Settings” menu, which you can find on a Mac in the upper left corner of your screen under the “CLIP STUDIO PAINT” dropdown. There is a shortcut for the shortcuts. It’ll take four fingers, thoughu000bu000b: Shift-CMD-OPTION-K. (Of course.) From there, just drill down on thelists until
LEARN CLIP STUDIO PAINT An Introduction to Clip Studio Assets. Clip Studio Assets is the new way of finding and downloading new materials, brushes, etc. for Clip Studio Paint. In this video, I'll show you how. 10 SITES WITH FREE FONTS FOR LETTERING YOUR COMICS A Mind Numbing Overwhelming Host of Free Fonts. 613 fonts for free classified as “Comic Book Fonts”, including Blambot’s stuff: Some stretch the definition of “Comic Book Font,” though. Blambot has a few free fonts listed. Look for the “F” in a word balloon next to the font name. 1001Fonts has 448 free fonts at FontSpace. FINDING FONTS EASIER WITH FONT LISTS Picking a font in Clip Studio Paint is not terribly easy, but you can narrow down your choices with some up front work to prepare font lists. You may have seen these in font manager programs. I use the one that comes with the Mac OS, called Font Book, for example. As you can see on the left side of the window, it lets you create families of fonts. You can do that in Clip Studio Paint, too! The THREE PLACES TO SLIDE IN CLIP STUDIO PAINT Zoom. Maybe you use the slider at the bottom of the window. Maybe you use the CMD-+ combination to zoom in. Maybe you have CMD-0 and CMD-APPLE-0 memorized to zoom into window size and pixel size, respectively. But you can also slide your way there through the Zoom tool. Click the forward slash button on the bottom right of yourkeyboard.
CLIP STUDIO PAINT: WHERE DO I START? The best resource to start learning about Clip Studio Paint (formerly Manga Studio) comes from Smith Micro, the program’s distributor here in North America. They have a series of videos created by Doug Hills that goes over each and every corner of the program in detail. HOW TO DO A COLOR HOLD Summing It Up. Click on Inks layer. Create New Layer. Click “Clip At Layer Below” button. Color your lines. Now you can have characters with red hair that doesn’t have a black outline around it, or detail work that you don’t want people to focus on blend in better with therest of the art.
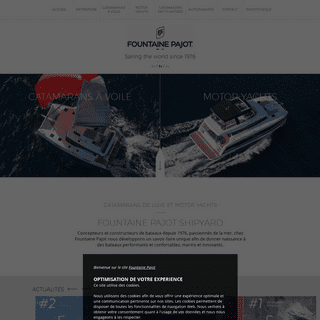
CHOOSING A FONT IN CLIP STUDIO PAINT Choosing a font in Clip Studio Paint can be a pain in the neck. But there is some help if you click some tiny buttons. It’s just a little hidden. In the Text tool properties, click on the Font drop down too show a list of fonts available for your use.. If you have a lot of fonts installed in your system — and you can see I’m pushing 1000 here — that drop down list is prohibitively long. SWITCH TOOLS TEMPORARILY Here’s the trick: If you hold down the keyboard shortcut, you’ll have access to that tool until you release the key. So you can keep drawing with your pen tool, hold down the “E” while you erase, and then take your finger off the “E” to get back to the pen. It’s super useful and super easy. 8 KEYBOARD SHORTCUTS TO CLIP STUDIO PAINT HAPPINESS The place to change the shortcuts is the “Shortcut Settings” menu, which you can find on a Mac in the upper left corner of your screen under the “CLIP STUDIO PAINT” dropdown. There is a shortcut for the shortcuts. It’ll take four fingers, thoughu000bu000b: Shift-CMD-OPTION-K. (Of course.) From there, just drill down on thelists until
INDICATORS VERSUS SLIDERS Indicators versus Sliders. When I started to write this post, I hated indicators and thought sliders were the One, True Way to go with Clip Studio Paint. In doing further research and playing with settings, I found a place for indicators. I still prefer sliders, in general, but I wound up with a grudging appreciation for the usefulness of sliders. LEARN CLIP STUDIO PAINT An Introduction to Clip Studio Assets. Clip Studio Assets is the new way of finding and downloading new materials, brushes, etc. for Clip Studio Paint. In this video, I'll show you how. ADD COPIC MARKERS TO YOUR TOOLKIT Copic Markers. I can offer you three choices for your Copic Marker brush needs: The Daub Marker set gives you a bunch of brushes which emulate both Copic Markers and Tombow markers. The set costs 2.50 Euros, which is still less than $3 American. It includes wet and dry Copic brush tips, and even a brush to emulate dried out markers. 10 SITES WITH FREE FONTS FOR LETTERING YOUR COMICS A Mind Numbing Overwhelming Host of Free Fonts. 613 fonts for free classified as “Comic Book Fonts”, including Blambot’s stuff: Some stretch the definition of “Comic Book Font,” though. Blambot has a few free fonts listed. Look for the “F” in a word balloon next to the font name. 1001Fonts has 448 free fonts at FontSpace. HOW TO ADD A BRUSH (OR PEN OR PENCIL) You have to open a Finder window on the screen. Here’s where you can CTRL-click individual brushes, or just shift-click to highlight a bunch that are already in a row. Then, click back to Clip Studio Paint. Now, drag and drop that brush or bunch of brushes to an empty spot in the tab where you want to add them.UNDO LIKE A PRO
Mistakes are inevitable. One of the best things about drawing digitally, though, is that you can undo your mistakes. You are already familiar with the power of CMD-Z (CTRL-Z on Windows) from a lifetime of computer use, I’m sure. It works the same way in Clip Studio Paint. CSP remembers a bunch of your most recent commands and artistic flourishes. You can usually step back in time a few stepsSIX WAYS TO ZOOM
The first is the standard slide to the left and right to zoom in and out. 4. The Zoom Tool – Draw a Rectangle. This one is handy when you want to fill the whole screen with a known particular area. Draw a rectangle around that area and it will fill the screen, no matter what zoom level it takes. 5. 30 SETS OF FREE BRUSHES YOU CAN DOWNLOAD NOW! Everybody loves to play with brushes in Clip Studio Paint. Today, I’ve compiled 30 different sets of brushes you can download for free from various places on the web.. I’m not making any claims as to how good these brushes are or how best to use them.THE BLUE LINE TRICK
This is the simplest solution, and the recommended one. Clip Studio Paint has a tool built in to deal with blue line layers. Choose the layer you want to turn into blue line art and go to the Layer Property tab, which should be (by default) in the window just above the layers window. Check the blue square to turn all your imagery on that layer HOW TO FLIP AN IMAGE If you’re on a Mac, click the “CLIP STUDIO PAINT” item in the upper left corner of the OS X title bar. Click on “Shortcut Settings.”. In the “Setting Area” dropdown box, choose “Main Menu.”. Then click on the same sequence as you did in the menu bar before. View –> Rotate/Invert –> Flip Horizontal. 8 KEYBOARD SHORTCUTS TO CLIP STUDIO PAINT HAPPINESS The place to change the shortcuts is the “Shortcut Settings” menu, which you can find on a Mac in the upper left corner of your screen under the “CLIP STUDIO PAINT” dropdown. There is a shortcut for the shortcuts. It’ll take four fingers, thoughu000bu000b: Shift-CMD-OPTION-K. (Of course.) From there, just drill down on thelists until
LEARN CLIP STUDIO PAINT An Introduction to Clip Studio Assets. Clip Studio Assets is the new way of finding and downloading new materials, brushes, etc. for Clip Studio Paint. In this video, I'll show you how. ADD COPIC MARKERS TO YOUR TOOLKIT Copic Markers. I can offer you three choices for your Copic Marker brush needs: The Daub Marker set gives you a bunch of brushes which emulate both Copic Markers and Tombow markers. The set costs 2.50 Euros, which is still less than $3 American. It includes wet and dry Copic brush tips, and even a brush to emulate dried out markers. 10 SITES WITH FREE FONTS FOR LETTERING YOUR COMICS A Mind Numbing Overwhelming Host of Free Fonts. 613 fonts for free classified as “Comic Book Fonts”, including Blambot’s stuff: Some stretch the definition of “Comic Book Font,” though. Blambot has a few free fonts listed. Look for the “F” in a word balloon next to the font name. 1001Fonts has 448 free fonts at FontSpace. HOW TO ADD A BRUSH (OR PEN OR PENCIL) You have to open a Finder window on the screen. Here’s where you can CTRL-click individual brushes, or just shift-click to highlight a bunch that are already in a row. Then, click back to Clip Studio Paint. Now, drag and drop that brush or bunch of brushes to an empty spot in the tab where you want to add them.UNDO LIKE A PRO
Mistakes are inevitable. One of the best things about drawing digitally, though, is that you can undo your mistakes. You are already familiar with the power of CMD-Z (CTRL-Z on Windows) from a lifetime of computer use, I’m sure. It works the same way in Clip Studio Paint. CSP remembers a bunch of your most recent commands and artistic flourishes. You can usually step back in time a few stepsSIX WAYS TO ZOOM
The first is the standard slide to the left and right to zoom in and out. 4. The Zoom Tool – Draw a Rectangle. This one is handy when you want to fill the whole screen with a known particular area. Draw a rectangle around that area and it will fill the screen, no matter what zoom level it takes. 5. 30 SETS OF FREE BRUSHES YOU CAN DOWNLOAD NOW! Everybody loves to play with brushes in Clip Studio Paint. Today, I’ve compiled 30 different sets of brushes you can download for free from various places on the web.. I’m not making any claims as to how good these brushes are or how best to use them.THE BLUE LINE TRICK
This is the simplest solution, and the recommended one. Clip Studio Paint has a tool built in to deal with blue line layers. Choose the layer you want to turn into blue line art and go to the Layer Property tab, which should be (by default) in the window just above the layers window. Check the blue square to turn all your imagery on that layer HOW TO FLIP AN IMAGE If you’re on a Mac, click the “CLIP STUDIO PAINT” item in the upper left corner of the OS X title bar. Click on “Shortcut Settings.”. In the “Setting Area” dropdown box, choose “Main Menu.”. Then click on the same sequence as you did in the menu bar before. View –> Rotate/Invert –> Flip Horizontal. 8 KEYBOARD SHORTCUTS TO CLIP STUDIO PAINT HAPPINESS The place to change the shortcuts is the “Shortcut Settings” menu, which you can find on a Mac in the upper left corner of your screen under the “CLIP STUDIO PAINT” dropdown. There is a shortcut for the shortcuts. It’ll take four fingers, thoughu000bu000b: Shift-CMD-OPTION-K. (Of course.) From there, just drill down on thelists until
LEARN CLIP STUDIO PAINT An Introduction to Clip Studio Assets. Clip Studio Assets is the new way of finding and downloading new materials, brushes, etc. for Clip Studio Paint. In this video, I'll show you how. 10 SITES WITH FREE FONTS FOR LETTERING YOUR COMICS A Mind Numbing Overwhelming Host of Free Fonts. 613 fonts for free classified as “Comic Book Fonts”, including Blambot’s stuff: Some stretch the definition of “Comic Book Font,” though. Blambot has a few free fonts listed. Look for the “F” in a word balloon next to the font name. 1001Fonts has 448 free fonts at FontSpace. FINDING FONTS EASIER WITH FONT LISTS Picking a font in Clip Studio Paint is not terribly easy, but you can narrow down your choices with some up front work to prepare font lists. You may have seen these in font manager programs. I use the one that comes with the Mac OS, called Font Book, for example. As you can see on the left side of the window, it lets you create families of fonts. You can do that in Clip Studio Paint, too! The THREE PLACES TO SLIDE IN CLIP STUDIO PAINT Zoom. Maybe you use the slider at the bottom of the window. Maybe you use the CMD-+ combination to zoom in. Maybe you have CMD-0 and CMD-APPLE-0 memorized to zoom into window size and pixel size, respectively. But you can also slide your way there through the Zoom tool. Click the forward slash button on the bottom right of yourkeyboard.
CLIP STUDIO PAINT: WHERE DO I START? The best resource to start learning about Clip Studio Paint (formerly Manga Studio) comes from Smith Micro, the program’s distributor here in North America. They have a series of videos created by Doug Hills that goes over each and every corner of the program in detail. HOW TO DO A COLOR HOLD Summing It Up. Click on Inks layer. Create New Layer. Click “Clip At Layer Below” button. Color your lines. Now you can have characters with red hair that doesn’t have a black outline around it, or detail work that you don’t want people to focus on blend in better with therest of the art.
CHOOSING A FONT IN CLIP STUDIO PAINT Choosing a font in Clip Studio Paint can be a pain in the neck. But there is some help if you click some tiny buttons. It’s just a little hidden. In the Text tool properties, click on the Font drop down too show a list of fonts available for your use.. If you have a lot of fonts installed in your system — and you can see I’m pushing 1000 here — that drop down list is prohibitively long. SWITCH TOOLS TEMPORARILY Here’s the trick: If you hold down the keyboard shortcut, you’ll have access to that tool until you release the key. So you can keep drawing with your pen tool, hold down the “E” while you erase, and then take your finger off the “E” to get back to the pen. It’s super useful and super easy. 8 KEYBOARD SHORTCUTS TO CLIP STUDIO PAINT HAPPINESS The place to change the shortcuts is the “Shortcut Settings” menu, which you can find on a Mac in the upper left corner of your screen under the “CLIP STUDIO PAINT” dropdown. There is a shortcut for the shortcuts. It’ll take four fingers, thoughu000bu000b: Shift-CMD-OPTION-K. (Of course.) From there, just drill down on thelists until
INDICATORS VERSUS SLIDERS Indicators versus Sliders. When I started to write this post, I hated indicators and thought sliders were the One, True Way to go with Clip Studio Paint. In doing further research and playing with settings, I found a place for indicators. I still prefer sliders, in general, but I wound up with a grudging appreciation for the usefulness of sliders. LEARN CLIP STUDIO PAINT An Introduction to Clip Studio Assets. Clip Studio Assets is the new way of finding and downloading new materials, brushes, etc. for Clip Studio Paint. In this video, I'll show you how. ADD COPIC MARKERS TO YOUR TOOLKIT Copic Markers. I can offer you three choices for your Copic Marker brush needs: The Daub Marker set gives you a bunch of brushes which emulate both Copic Markers and Tombow markers. The set costs 2.50 Euros, which is still less than $3 American. It includes wet and dry Copic brush tips, and even a brush to emulate dried out markers. 10 SITES WITH FREE FONTS FOR LETTERING YOUR COMICS A Mind Numbing Overwhelming Host of Free Fonts. 613 fonts for free classified as “Comic Book Fonts”, including Blambot’s stuff: Some stretch the definition of “Comic Book Font,” though. Blambot has a few free fonts listed. Look for the “F” in a word balloon next to the font name. 1001Fonts has 448 free fonts at FontSpace. HOW TO ADD A BRUSH (OR PEN OR PENCIL) You have to open a Finder window on the screen. Here’s where you can CTRL-click individual brushes, or just shift-click to highlight a bunch that are already in a row. Then, click back to Clip Studio Paint. Now, drag and drop that brush or bunch of brushes to an empty spot in the tab where you want to add them.SIX WAYS TO ZOOM
The first is the standard slide to the left and right to zoom in and out. 4. The Zoom Tool – Draw a Rectangle. This one is handy when you want to fill the whole screen with a known particular area. Draw a rectangle around that area and it will fill the screen, no matter what zoom level it takes. 5. 30 SETS OF FREE BRUSHES YOU CAN DOWNLOAD NOW! Everybody loves to play with brushes in Clip Studio Paint. Today, I’ve compiled 30 different sets of brushes you can download for free from various places on the web.. I’m not making any claims as to how good these brushes are or how best to use them. FINDING FONTS EASIER WITH FONT LISTSTHE BLUE LINE TRICK
This is the simplest solution, and the recommended one. Clip Studio Paint has a tool built in to deal with blue line layers. Choose the layer you want to turn into blue line art and go to the Layer Property tab, which should be (by default) in the window just above the layers window. Check the blue square to turn all your imagery on that layer HOW DO I PICK THE RIGHT SKIN TONE? Click the Color Set tab. That’s this one: You can also get there from the menus with Window –> Color Set. Now, the key to this whole process is the little hamburger-like icon in the upper left corner of the window that looks like it’s grayed out. Don’t click the wrenches, which is what you might have gone to first. HOW TO FLIP AN IMAGE If you’re on a Mac, click the “CLIP STUDIO PAINT” item in the upper left corner of the OS X title bar. Click on “Shortcut Settings.”. In the “Setting Area” dropdown box, choose “Main Menu.”. Then click on the same sequence as you did in the menu bar before. View –> Rotate/Invert –> Flip Horizontal. LEARN CLIP STUDIO PAINT An Introduction to Clip Studio Assets. Clip Studio Assets is the new way of finding and downloading new materials, brushes, etc. for Clip Studio Paint. In this video, I'll show you how. ADD COPIC MARKERS TO YOUR TOOLKIT Copic Markers. I can offer you three choices for your Copic Marker brush needs: The Daub Marker set gives you a bunch of brushes which emulate both Copic Markers and Tombow markers. The set costs 2.50 Euros, which is still less than $3 American. It includes wet and dry Copic brush tips, and even a brush to emulate dried out markers. 10 SITES WITH FREE FONTS FOR LETTERING YOUR COMICS A Mind Numbing Overwhelming Host of Free Fonts. 613 fonts for free classified as “Comic Book Fonts”, including Blambot’s stuff: Some stretch the definition of “Comic Book Font,” though. Blambot has a few free fonts listed. Look for the “F” in a word balloon next to the font name. 1001Fonts has 448 free fonts at FontSpace. HOW TO ADD A BRUSH (OR PEN OR PENCIL) You have to open a Finder window on the screen. Here’s where you can CTRL-click individual brushes, or just shift-click to highlight a bunch that are already in a row. Then, click back to Clip Studio Paint. Now, drag and drop that brush or bunch of brushes to an empty spot in the tab where you want to add them.SIX WAYS TO ZOOM
The first is the standard slide to the left and right to zoom in and out. 4. The Zoom Tool – Draw a Rectangle. This one is handy when you want to fill the whole screen with a known particular area. Draw a rectangle around that area and it will fill the screen, no matter what zoom level it takes. 5. 30 SETS OF FREE BRUSHES YOU CAN DOWNLOAD NOW! Everybody loves to play with brushes in Clip Studio Paint. Today, I’ve compiled 30 different sets of brushes you can download for free from various places on the web.. I’m not making any claims as to how good these brushes are or how best to use them. FINDING FONTS EASIER WITH FONT LISTSTHE BLUE LINE TRICK
This is the simplest solution, and the recommended one. Clip Studio Paint has a tool built in to deal with blue line layers. Choose the layer you want to turn into blue line art and go to the Layer Property tab, which should be (by default) in the window just above the layers window. Check the blue square to turn all your imagery on that layer HOW DO I PICK THE RIGHT SKIN TONE? Click the Color Set tab. That’s this one: You can also get there from the menus with Window –> Color Set. Now, the key to this whole process is the little hamburger-like icon in the upper left corner of the window that looks like it’s grayed out. Don’t click the wrenches, which is what you might have gone to first. HOW TO FLIP AN IMAGE If you’re on a Mac, click the “CLIP STUDIO PAINT” item in the upper left corner of the OS X title bar. Click on “Shortcut Settings.”. In the “Setting Area” dropdown box, choose “Main Menu.”. Then click on the same sequence as you did in the menu bar before. View –> Rotate/Invert –> Flip Horizontal. LEARN CLIP STUDIO PAINT An Introduction to Clip Studio Assets. Clip Studio Assets is the new way of finding and downloading new materials, brushes, etc. for Clip Studio Paint. In this video, I'll show you how. ABOUT - LEARN CLIP STUDIO PAINT - LEARNCSP.COM It’s made specifically to help comic book artists, but functions well as a general drawing, painting, image editing, and graphic design program. For less than $50, it’s a steal. Bad News: There is a learning curve. It can be a tedious and time consuming one. The manual that comes with CSP is nearly 900 pages, and most of it is useless. PICKING THE RIGHT CANVAS SIZE If your plan is to paint digitally with Clip Studio Paint — and the brush tools are an awesome fit for that — then look at real world canvas sizes. That can go anywhere from 6″ squares to 20″ x 24″. If you’re the type to emulate Todd Nauck and draw on Post FINDING FONTS EASIER WITH FONT LISTS Picking a font in Clip Studio Paint is not terribly easy, but you can narrow down your choices with some up front work to prepare font lists. You may have seen these in font manager programs. I use the one that comes with the Mac OS, called Font Book, for example. As you can see on the left side of the window, it lets you create families of fonts. You can do that in Clip Studio Paint, too! TheUNDO LIKE A PRO
Mistakes are inevitable. One of the best things about drawing digitally, though, is that you can undo your mistakes. You are already familiar with the power of CMD-Z (CTRL-Z on Windows) from a lifetime of computer use, I’m sure. It works the same way in Clip Studio Paint. CSP remembers a bunch of your most recent commands and artistic flourishes. You can usually step back in time a few steps LEARN CLIP STUDIO PAINT How to Add a Brush (or Pen or Pencil) Clip Studio Paint breaks your art creation tools into three categories: Pens, Pencils, and Brushes. It’s completely arbitrary, but it is suggested that you organize your tools. Read more. CLIP STUDIO PAINT: WHERE DO I START? The best resource to start learning about Clip Studio Paint (formerly Manga Studio) comes from Smith Micro, the program’s distributor here in North America. They have a series of videos created by Doug Hills that goes over each and every corner of the program in detail. It’s how I first started to learn the ins and outs of the program after SWITCH TOOLS TEMPORARILY Here’s the trick: If you hold down the keyboard shortcut, you’ll have access to that tool until you release the key. So you can keep drawing with your pen tool, hold down the “E” while you erase, and then take your finger off the “E” to get back to the pen. It’s super useful and super easy. INDICATORS VERSUS SLIDERS Indicators versus Sliders. When I started to write this post, I hated indicators and thought sliders were the One, True Way to go with Clip Studio Paint. In doing further research and playing with settings, I found a place for indicators. I still prefer sliders, in general, but I wound up with a grudging appreciation for the usefulness of sliders. 8 KEYBOARD SHORTCUTS TO CLIP STUDIO PAINT HAPPINESS The place to change the shortcuts is the “Shortcut Settings” menu, which you can find on a Mac in the upper left corner of your screen under the “CLIP STUDIO PAINT” dropdown. There is a shortcut for the shortcuts. It’ll take four fingers, thoughu000bu000b: Shift-CMD-OPTION-K. (Of course.) From there, just drill down on thelists until
LEARN CLIP STUDIO PAINT An Introduction to Clip Studio Assets. Clip Studio Assets is the new way of finding and downloading new materials, brushes, etc. for Clip Studio Paint. In this video, I'll show you how. ADD COPIC MARKERS TO YOUR TOOLKIT Copic Markers. I can offer you three choices for your Copic Marker brush needs: The Daub Marker set gives you a bunch of brushes which emulate both Copic Markers and Tombow markers. The set costs 2.50 Euros, which is still less than $3 American. It includes wet and dry Copic brush tips, and even a brush to emulate dried out markers. 10 SITES WITH FREE FONTS FOR LETTERING YOUR COMICS A Mind Numbing Overwhelming Host of Free Fonts. 613 fonts for free classified as “Comic Book Fonts”, including Blambot’s stuff: Some stretch the definition of “Comic Book Font,” though. Blambot has a few free fonts listed. Look for the “F” in a word balloon next to the font name. 1001Fonts has 448 free fonts at FontSpace. HOW TO ADD A BRUSH (OR PEN OR PENCIL) You have to open a Finder window on the screen. Here’s where you can CTRL-click individual brushes, or just shift-click to highlight a bunch that are already in a row. Then, click back to Clip Studio Paint. Now, drag and drop that brush or bunch of brushes to an empty spot in the tab where you want to add them. PICKING THE RIGHT CANVAS SIZE If your plan is to paint digitally with Clip Studio Paint — and the brush tools are an awesome fit for that — then look at real world canvas sizes. That can go anywhere from 6″ squares to 20″ x 24″. If you’re the type to emulate Todd Nauck and draw on Post 30 SETS OF FREE BRUSHES YOU CAN DOWNLOAD NOW! Everybody loves to play with brushes in Clip Studio Paint. Today, I’ve compiled 30 different sets of brushes you can download for free from various places on the web.. I’m not making any claims as to how good these brushes are or how best to use them.SIX WAYS TO ZOOM
The first is the standard slide to the left and right to zoom in and out. 4. The Zoom Tool – Draw a Rectangle. This one is handy when you want to fill the whole screen with a known particular area. Draw a rectangle around that area and it will fill the screen, no matter what zoom level it takes. 5.THE BLUE LINE TRICK
This is the simplest solution, and the recommended one. Clip Studio Paint has a tool built in to deal with blue line layers. Choose the layer you want to turn into blue line art and go to the Layer Property tab, which should be (by default) in the window just above the layers window. Check the blue square to turn all your imagery on that layer HOW TO FLIP AN IMAGE If you’re on a Mac, click the “CLIP STUDIO PAINT” item in the upper left corner of the OS X title bar. Click on “Shortcut Settings.”. In the “Setting Area” dropdown box, choose “Main Menu.”. Then click on the same sequence as you did in the menu bar before. View –> Rotate/Invert –> Flip Horizontal. 8 KEYBOARD SHORTCUTS TO CLIP STUDIO PAINT HAPPINESS The place to change the shortcuts is the “Shortcut Settings” menu, which you can find on a Mac in the upper left corner of your screen under the “CLIP STUDIO PAINT” dropdown. There is a shortcut for the shortcuts. It’ll take four fingers, thoughu000bu000b: Shift-CMD-OPTION-K. (Of course.) From there, just drill down on thelists until
ABOUT - LEARN CLIP STUDIO PAINT - LEARNCSP.COM It’s made specifically to help comic book artists, but functions well as a general drawing, painting, image editing, and graphic design program. For less than $50, it’s a steal. Bad News: There is a learning curve. It can be a tedious and time consuming one. The manual that comes with CSP is nearly 900 pages, and most of it is useless. 10 SITES WITH FREE FONTS FOR LETTERING YOUR COMICS A Mind Numbing Overwhelming Host of Free Fonts. 613 fonts for free classified as “Comic Book Fonts”, including Blambot’s stuff: Some stretch the definition of “Comic Book Font,” though. Blambot has a few free fonts listed. Look for the “F” in a word balloon next to the font name. 1001Fonts has 448 free fonts at FontSpace.UNDO LIKE A PRO
Mistakes are inevitable. One of the best things about drawing digitally, though, is that you can undo your mistakes. You are already familiar with the power of CMD-Z (CTRL-Z on Windows) from a lifetime of computer use, I’m sure. It works the same way in Clip Studio Paint. CSP remembers a bunch of your most recent commands and artistic flourishes. You can usually step back in time a few steps FINDING FONTS EASIER WITH FONT LISTS Picking a font in Clip Studio Paint is not terribly easy, but you can narrow down your choices with some up front work to prepare font lists. You may have seen these in font manager programs. I use the one that comes with the Mac OS, called Font Book, for example. As you can see on the left side of the window, it lets you create families of fonts. You can do that in Clip Studio Paint, too! The THREE PLACES TO SLIDE IN CLIP STUDIO PAINT Zoom. Maybe you use the slider at the bottom of the window. Maybe you use the CMD-+ combination to zoom in. Maybe you have CMD-0 and CMD-APPLE-0 memorized to zoom into window size and pixel size, respectively. But you can also slide your way there through the Zoom tool. Click the forward slash button on the bottom right of yourkeyboard.
HOW DO I PICK THE RIGHT SKIN TONE? Click the Color Set tab. That’s this one: You can also get there from the menus with Window –> Color Set. Now, the key to this whole process is the little hamburger-like icon in the upper left corner of the window that looks like it’s grayed out. Don’t click the wrenches, which is what you might have gone to first. CLIP STUDIO PAINT: WHERE DO I START? The best resource to start learning about Clip Studio Paint (formerly Manga Studio) comes from Smith Micro, the program’s distributor here in North America. They have a series of videos created by Doug Hills that goes over each and every corner of the program in detail. It’s how I first started to learn the ins and outs of the program after CHOOSING A FONT IN CLIP STUDIO PAINT Choosing a font in Clip Studio Paint can be a pain in the neck. But there is some help if you click some tiny buttons. It’s just a little hidden. In the Text tool properties, click on the Font drop down too show a list of fonts available for your use.. If you have a lot of fonts installed in your system — and you can see I’m pushing 1000 here — that drop down list is prohibitively long. HOW TO DO A COLOR HOLD Summing It Up. Click on Inks layer. Create New Layer. Click “Clip At Layer Below” button. Color your lines. Now you can have characters with red hair that doesn’t have a black outline around it, or detail work that you don’t want people to focus on blend in better with therest of the art.
SWITCH TOOLS TEMPORARILY Here’s the trick: If you hold down the keyboard shortcut, you’ll have access to that tool until you release the key. So you can keep drawing with your pen tool, hold down the “E” while you erase, and then take your finger off the “E” to get back to the pen. It’s super useful and super easy. LEARN CLIP STUDIO PAINT An Introduction to Clip Studio Assets. Clip Studio Assets is the new way of finding and downloading new materials, brushes, etc. for Clip Studio Paint. In this video, I'll show you how. ABOUT - LEARN CLIP STUDIO PAINT - LEARNCSP.COMSEE MORE ON LEARNCSP.COMCLIP STUDIO PAINT AUTO COLORCLIP STUDIO PAINT COLOR REPLACECLIP STUDIO PAINT COLORING TUTORIALCLIP STUDIO PAINT PROCLIP STUDIO PAINT SHADINGHOW MUCH IS CLIP STUDIO PAINT ADD COPIC MARKERS TO YOUR TOOLKIT Copic Markers. I can offer you three choices for your Copic Marker brush needs: The Daub Marker set gives you a bunch of brushes which emulate both Copic Markers and Tombow markers. The set costs 2.50 Euros, which is still less than $3 American. It includes wet and dry Copic brush tips, and even a brush to emulate dried out markers. PICKING THE RIGHT CANVAS SIZE If your plan is to paint digitally with Clip Studio Paint — and the brush tools are an awesome fit for that — then look at real world canvas sizes. That can go anywhere from 6″ squares to 20″ x 24″. If you’re the type to emulate Todd Nauck and draw on Post HOW TO ADD A BRUSH (OR PEN OR PENCIL) You have to open a Finder window on the screen. Here’s where you can CTRL-click individual brushes, or just shift-click to highlight a bunch that are already in a row. Then, click back to Clip Studio Paint. Now, drag and drop that brush or bunch of brushes to an empty spot in the tab where you want to add them.SIX WAYS TO ZOOM
The first is the standard slide to the left and right to zoom in and out. 4. The Zoom Tool – Draw a Rectangle. This one is handy when you want to fill the whole screen with a known particular area. Draw a rectangle around that area and it will fill the screen, no matter what zoom level it takes. 5. 30 SETS OF FREE BRUSHES YOU CAN DOWNLOAD NOW! Everybody loves to play with brushes in Clip Studio Paint. Today, I’ve compiled 30 different sets of brushes you can download for free from various places on the web.. I’m not making any claims as to how good these brushes are or how best to use them.UNDO LIKE A PRO
Mistakes are inevitable. One of the best things about drawing digitally, though, is that you can undo your mistakes. You are already familiar with the power of CMD-Z (CTRL-Z on Windows) from a lifetime of computer use, I’m sure. It works the same way in Clip Studio Paint. CSP remembers a bunch of your most recent commands and artistic flourishes. You can usually step back in time a few stepsTHE BLUE LINE TRICK
This is the simplest solution, and the recommended one. Clip Studio Paint has a tool built in to deal with blue line layers. Choose the layer you want to turn into blue line art and go to the Layer Property tab, which should be (by default) in the window just above the layers window. Check the blue square to turn all your imagery on that layer HOW TO FLIP AN IMAGE If you’re on a Mac, click the “CLIP STUDIO PAINT” item in the upper left corner of the OS X title bar. Click on “Shortcut Settings.”. In the “Setting Area” dropdown box, choose “Main Menu.”. Then click on the same sequence as you did in the menu bar before. View –> Rotate/Invert –> Flip Horizontal. LEARN CLIP STUDIO PAINT An Introduction to Clip Studio Assets. Clip Studio Assets is the new way of finding and downloading new materials, brushes, etc. for Clip Studio Paint. In this video, I'll show you how. ABOUT - LEARN CLIP STUDIO PAINT - LEARNCSP.COMSEE MORE ON LEARNCSP.COMCLIP STUDIO PAINT AUTO COLORCLIP STUDIO PAINT COLOR REPLACECLIP STUDIO PAINT COLORING TUTORIALCLIP STUDIO PAINT PROCLIP STUDIO PAINT SHADINGHOW MUCH IS CLIP STUDIO PAINT ADD COPIC MARKERS TO YOUR TOOLKIT Copic Markers. I can offer you three choices for your Copic Marker brush needs: The Daub Marker set gives you a bunch of brushes which emulate both Copic Markers and Tombow markers. The set costs 2.50 Euros, which is still less than $3 American. It includes wet and dry Copic brush tips, and even a brush to emulate dried out markers. PICKING THE RIGHT CANVAS SIZE If your plan is to paint digitally with Clip Studio Paint — and the brush tools are an awesome fit for that — then look at real world canvas sizes. That can go anywhere from 6″ squares to 20″ x 24″. If you’re the type to emulate Todd Nauck and draw on Post HOW TO ADD A BRUSH (OR PEN OR PENCIL) You have to open a Finder window on the screen. Here’s where you can CTRL-click individual brushes, or just shift-click to highlight a bunch that are already in a row. Then, click back to Clip Studio Paint. Now, drag and drop that brush or bunch of brushes to an empty spot in the tab where you want to add them.SIX WAYS TO ZOOM
The first is the standard slide to the left and right to zoom in and out. 4. The Zoom Tool – Draw a Rectangle. This one is handy when you want to fill the whole screen with a known particular area. Draw a rectangle around that area and it will fill the screen, no matter what zoom level it takes. 5. 30 SETS OF FREE BRUSHES YOU CAN DOWNLOAD NOW! Everybody loves to play with brushes in Clip Studio Paint. Today, I’ve compiled 30 different sets of brushes you can download for free from various places on the web.. I’m not making any claims as to how good these brushes are or how best to use them.UNDO LIKE A PRO
Mistakes are inevitable. One of the best things about drawing digitally, though, is that you can undo your mistakes. You are already familiar with the power of CMD-Z (CTRL-Z on Windows) from a lifetime of computer use, I’m sure. It works the same way in Clip Studio Paint. CSP remembers a bunch of your most recent commands and artistic flourishes. You can usually step back in time a few stepsTHE BLUE LINE TRICK
This is the simplest solution, and the recommended one. Clip Studio Paint has a tool built in to deal with blue line layers. Choose the layer you want to turn into blue line art and go to the Layer Property tab, which should be (by default) in the window just above the layers window. Check the blue square to turn all your imagery on that layer HOW TO FLIP AN IMAGE If you’re on a Mac, click the “CLIP STUDIO PAINT” item in the upper left corner of the OS X title bar. Click on “Shortcut Settings.”. In the “Setting Area” dropdown box, choose “Main Menu.”. Then click on the same sequence as you did in the menu bar before. View –> Rotate/Invert –> Flip Horizontal. ABOUT - LEARN CLIP STUDIO PAINT - LEARNCSP.COM The Set Up. You’re a budding artist, looking to take advantage of all the things people tell you drawing digitally will help you to do. You buy Clip Studio Paint, because Photoshop is too expensive, costs money every month, and has too much stuff in it. It’s a confusingmess that
10 SITES WITH FREE FONTS FOR LETTERING YOUR COMICS A Mind Numbing Overwhelming Host of Free Fonts. 613 fonts for free classified as “Comic Book Fonts”, including Blambot’s stuff: Some stretch the definition of “Comic Book Font,” though. Blambot has a few free fonts listed. Look for the “F” in a word balloon next to the font name. 1001Fonts has 448 free fonts at FontSpace. LEARN CLIP STUDIO PAINT How to Add a Brush (or Pen or Pencil) Clip Studio Paint breaks your art creation tools into three categories: Pens, Pencils, and Brushes. It’s completely arbitrary, but it is suggested that you organize your tools. Read more. HOW DO I PICK THE RIGHT SKIN TONE? Click the Color Set tab. That’s this one: You can also get there from the menus with Window –> Color Set. Now, the key to this whole process is the little hamburger-like icon in the upper left corner of the window that looks like it’s grayed out. Don’t click the wrenches, which is what you might have gone to first. THREE PLACES TO SLIDE IN CLIP STUDIO PAINT Zoom. Maybe you use the slider at the bottom of the window. Maybe you use the CMD-+ combination to zoom in. Maybe you have CMD-0 and CMD-APPLE-0 memorized to zoom into window size and pixel size, respectively. But you can also slide your way there through the Zoom tool. Click the forward slash button on the bottom right of yourkeyboard.
FINDING FONTS EASIER WITH FONT LISTS Picking a font in Clip Studio Paint is not terribly easy, but you can narrow down your choices with some up front work to prepare font lists. You may have seen these in font manager programs. I use the one that comes with the Mac OS, called Font Book, for example. As you can see on the left side of the window, it lets you create families of fonts. You can do that in Clip Studio Paint, too! The CLIP STUDIO PAINT: WHERE DO I START? The best resource to start learning about Clip Studio Paint (formerly Manga Studio) comes from Smith Micro, the program’s distributor here in North America. They have a series of videos created by Doug Hills that goes over each and every corner of the program in detail. It’s how I first started to learn the ins and outs of the program after CHOOSING A FONT IN CLIP STUDIO PAINT Choosing a font in Clip Studio Paint can be a pain in the neck. But there is some help if you click some tiny buttons. It’s just a little hidden. In the Text tool properties, click on the Font drop down too show a list of fonts available for your use.. If you have a lot of fonts installed in your system — and you can see I’m pushing 1000 here — that drop down list is prohibitively long. HOW TO DO A COLOR HOLD Summing It Up. Click on Inks layer. Create New Layer. Click “Clip At Layer Below” button. Color your lines. Now you can have characters with red hair that doesn’t have a black outline around it, or detail work that you don’t want people to focus on blend in better with therest of the art.
8 KEYBOARD SHORTCUTS TO CLIP STUDIO PAINT HAPPINESS The place to change the shortcuts is the “Shortcut Settings” menu, which you can find on a Mac in the upper left corner of your screen under the “CLIP STUDIO PAINT” dropdown. There is a shortcut for the shortcuts. It’ll take four fingers, thoughu000bu000b: Shift-CMD-OPTION-K. (Of course.) From there, just drill down on thelists until
LEARN CLIP STUDIO PAINT An Introduction to Clip Studio Assets. Clip Studio Assets is the new way of finding and downloading new materials, brushes, etc. for Clip Studio Paint. In this video, I'll show you how. ABOUT - LEARN CLIP STUDIO PAINT - LEARNCSP.COMSEE MORE ON LEARNCSP.COMCLIP STUDIO PAINT AUTO COLORCLIP STUDIO PAINT COLOR REPLACECLIP STUDIO PAINT COLORING TUTORIALCLIP STUDIO PAINT PROCLIP STUDIO PAINT SHADINGHOW MUCH IS CLIP STUDIO PAINT ADD COPIC MARKERS TO YOUR TOOLKIT Copic Markers. I can offer you three choices for your Copic Marker brush needs: The Daub Marker set gives you a bunch of brushes which emulate both Copic Markers and Tombow markers. The set costs 2.50 Euros, which is still less than $3 American. It includes wet and dry Copic brush tips, and even a brush to emulate dried out markers. PICKING THE RIGHT CANVAS SIZE If your plan is to paint digitally with Clip Studio Paint — and the brush tools are an awesome fit for that — then look at real world canvas sizes. That can go anywhere from 6″ squares to 20″ x 24″. If you’re the type to emulate Todd Nauck and draw on Post HOW TO ADD A BRUSH (OR PEN OR PENCIL) You have to open a Finder window on the screen. Here’s where you can CTRL-click individual brushes, or just shift-click to highlight a bunch that are already in a row. Then, click back to Clip Studio Paint. Now, drag and drop that brush or bunch of brushes to an empty spot in the tab where you want to add them.SIX WAYS TO ZOOM
The first is the standard slide to the left and right to zoom in and out. 4. The Zoom Tool – Draw a Rectangle. This one is handy when you want to fill the whole screen with a known particular area. Draw a rectangle around that area and it will fill the screen, no matter what zoom level it takes. 5. 30 SETS OF FREE BRUSHES YOU CAN DOWNLOAD NOW! Everybody loves to play with brushes in Clip Studio Paint. Today, I’ve compiled 30 different sets of brushes you can download for free from various places on the web.. I’m not making any claims as to how good these brushes are or how best to use them.UNDO LIKE A PRO
Mistakes are inevitable. One of the best things about drawing digitally, though, is that you can undo your mistakes. You are already familiar with the power of CMD-Z (CTRL-Z on Windows) from a lifetime of computer use, I’m sure. It works the same way in Clip Studio Paint. CSP remembers a bunch of your most recent commands and artistic flourishes. You can usually step back in time a few stepsTHE BLUE LINE TRICK
This is the simplest solution, and the recommended one. Clip Studio Paint has a tool built in to deal with blue line layers. Choose the layer you want to turn into blue line art and go to the Layer Property tab, which should be (by default) in the window just above the layers window. Check the blue square to turn all your imagery on that layer HOW TO FLIP AN IMAGE If you’re on a Mac, click the “CLIP STUDIO PAINT” item in the upper left corner of the OS X title bar. Click on “Shortcut Settings.”. In the “Setting Area” dropdown box, choose “Main Menu.”. Then click on the same sequence as you did in the menu bar before. View –> Rotate/Invert –> Flip Horizontal. LEARN CLIP STUDIO PAINT An Introduction to Clip Studio Assets. Clip Studio Assets is the new way of finding and downloading new materials, brushes, etc. for Clip Studio Paint. In this video, I'll show you how. ABOUT - LEARN CLIP STUDIO PAINT - LEARNCSP.COMSEE MORE ON LEARNCSP.COMCLIP STUDIO PAINT AUTO COLORCLIP STUDIO PAINT COLOR REPLACECLIP STUDIO PAINT COLORING TUTORIALCLIP STUDIO PAINT PROCLIP STUDIO PAINT SHADINGHOW MUCH IS CLIP STUDIO PAINT ADD COPIC MARKERS TO YOUR TOOLKIT Copic Markers. I can offer you three choices for your Copic Marker brush needs: The Daub Marker set gives you a bunch of brushes which emulate both Copic Markers and Tombow markers. The set costs 2.50 Euros, which is still less than $3 American. It includes wet and dry Copic brush tips, and even a brush to emulate dried out markers. PICKING THE RIGHT CANVAS SIZE If your plan is to paint digitally with Clip Studio Paint — and the brush tools are an awesome fit for that — then look at real world canvas sizes. That can go anywhere from 6″ squares to 20″ x 24″. If you’re the type to emulate Todd Nauck and draw on Post HOW TO ADD A BRUSH (OR PEN OR PENCIL) You have to open a Finder window on the screen. Here’s where you can CTRL-click individual brushes, or just shift-click to highlight a bunch that are already in a row. Then, click back to Clip Studio Paint. Now, drag and drop that brush or bunch of brushes to an empty spot in the tab where you want to add them.SIX WAYS TO ZOOM
The first is the standard slide to the left and right to zoom in and out. 4. The Zoom Tool – Draw a Rectangle. This one is handy when you want to fill the whole screen with a known particular area. Draw a rectangle around that area and it will fill the screen, no matter what zoom level it takes. 5. 30 SETS OF FREE BRUSHES YOU CAN DOWNLOAD NOW! Everybody loves to play with brushes in Clip Studio Paint. Today, I’ve compiled 30 different sets of brushes you can download for free from various places on the web.. I’m not making any claims as to how good these brushes are or how best to use them.UNDO LIKE A PRO
Mistakes are inevitable. One of the best things about drawing digitally, though, is that you can undo your mistakes. You are already familiar with the power of CMD-Z (CTRL-Z on Windows) from a lifetime of computer use, I’m sure. It works the same way in Clip Studio Paint. CSP remembers a bunch of your most recent commands and artistic flourishes. You can usually step back in time a few stepsTHE BLUE LINE TRICK
This is the simplest solution, and the recommended one. Clip Studio Paint has a tool built in to deal with blue line layers. Choose the layer you want to turn into blue line art and go to the Layer Property tab, which should be (by default) in the window just above the layers window. Check the blue square to turn all your imagery on that layer HOW TO FLIP AN IMAGE If you’re on a Mac, click the “CLIP STUDIO PAINT” item in the upper left corner of the OS X title bar. Click on “Shortcut Settings.”. In the “Setting Area” dropdown box, choose “Main Menu.”. Then click on the same sequence as you did in the menu bar before. View –> Rotate/Invert –> Flip Horizontal. ABOUT - LEARN CLIP STUDIO PAINT - LEARNCSP.COM The Set Up. You’re a budding artist, looking to take advantage of all the things people tell you drawing digitally will help you to do. You buy Clip Studio Paint, because Photoshop is too expensive, costs money every month, and has too much stuff in it. It’s a confusingmess that
10 SITES WITH FREE FONTS FOR LETTERING YOUR COMICS A Mind Numbing Overwhelming Host of Free Fonts. 613 fonts for free classified as “Comic Book Fonts”, including Blambot’s stuff: Some stretch the definition of “Comic Book Font,” though. Blambot has a few free fonts listed. Look for the “F” in a word balloon next to the font name. 1001Fonts has 448 free fonts at FontSpace. LEARN CLIP STUDIO PAINT How to Add a Brush (or Pen or Pencil) Clip Studio Paint breaks your art creation tools into three categories: Pens, Pencils, and Brushes. It’s completely arbitrary, but it is suggested that you organize your tools. Read more. HOW DO I PICK THE RIGHT SKIN TONE? Click the Color Set tab. That’s this one: You can also get there from the menus with Window –> Color Set. Now, the key to this whole process is the little hamburger-like icon in the upper left corner of the window that looks like it’s grayed out. Don’t click the wrenches, which is what you might have gone to first. THREE PLACES TO SLIDE IN CLIP STUDIO PAINT Zoom. Maybe you use the slider at the bottom of the window. Maybe you use the CMD-+ combination to zoom in. Maybe you have CMD-0 and CMD-APPLE-0 memorized to zoom into window size and pixel size, respectively. But you can also slide your way there through the Zoom tool. Click the forward slash button on the bottom right of yourkeyboard.
FINDING FONTS EASIER WITH FONT LISTS Picking a font in Clip Studio Paint is not terribly easy, but you can narrow down your choices with some up front work to prepare font lists. You may have seen these in font manager programs. I use the one that comes with the Mac OS, called Font Book, for example. As you can see on the left side of the window, it lets you create families of fonts. You can do that in Clip Studio Paint, too! The CLIP STUDIO PAINT: WHERE DO I START? The best resource to start learning about Clip Studio Paint (formerly Manga Studio) comes from Smith Micro, the program’s distributor here in North America. They have a series of videos created by Doug Hills that goes over each and every corner of the program in detail. It’s how I first started to learn the ins and outs of the program after CHOOSING A FONT IN CLIP STUDIO PAINT Choosing a font in Clip Studio Paint can be a pain in the neck. But there is some help if you click some tiny buttons. It’s just a little hidden. In the Text tool properties, click on the Font drop down too show a list of fonts available for your use.. If you have a lot of fonts installed in your system — and you can see I’m pushing 1000 here — that drop down list is prohibitively long. HOW TO DO A COLOR HOLD Summing It Up. Click on Inks layer. Create New Layer. Click “Clip At Layer Below” button. Color your lines. Now you can have characters with red hair that doesn’t have a black outline around it, or detail work that you don’t want people to focus on blend in better with therest of the art.
8 KEYBOARD SHORTCUTS TO CLIP STUDIO PAINT HAPPINESS The place to change the shortcuts is the “Shortcut Settings” menu, which you can find on a Mac in the upper left corner of your screen under the “CLIP STUDIO PAINT” dropdown. There is a shortcut for the shortcuts. It’ll take four fingers, thoughu000bu000b: Shift-CMD-OPTION-K. (Of course.) From there, just drill down on thelists until
* About
* Press
* About
* Press
__ __
__ __ __
__ __
Beginners Tutorial
Video
AN INTRODUCTION TO CLIP STUDIO ASSETSDecember 21, 2016
Beginners
UNDO LIKE A PRO
November 21, 2016
Beginners Video
SWITCH TOOLS TEMPORARILYFebruary 22, 2017
Tutorial
INDICATORS VERSUS SLIDERSJanuary 13, 2017
Beginners Tutorial
Video
AN INTRODUCTION TO CLIP STUDIO ASSETSDecember 21, 2016
Beginners
UNDO LIKE A PRO
November 21, 2016
Beginners Video
SWITCH TOOLS TEMPORARILYFebruary 22, 2017
Tutorial
INDICATORS VERSUS SLIDERSJanuary 13, 2017
SWITCH TOOLS TEMPORARILY Clip Studio Paint has a trick to switch to a new tool temporarily, giving you a quicker way to go back and forth between tools, if you…Read more
February 22, 2017
__
__
__
__
INDICATORS VERSUS SLIDERS One of the annoying bits of UI in Clip Studio Paint is the series of squares to indicate a growing selection. Here's how to change it…Read more
January 13, 2017
__
__
__
__
__
AN INTRODUCTION TO CLIP STUDIO ASSETS Clip Studio Assets is the new way of finding and downloading new materials, brushes, etc. for Clip Studio Paint. In this video, I'llshow you how…
Read more
December 21, 2016
__
__
__
__
UNDO LIKE A PRO
Mistakes are inevitable. One of the best things about drawing digitally, though, is that you can undo your mistakes. You are already familiar with the power of…Read more
November 21, 2016
__
__
__
__
HOW TO MAKE (OR FAKE) HEATHER GRAY You can emulate the look of Heather Gray in Clip Studio Paint in only three steps, with two filters. It's a simple trick.…Read more
October 29, 2016
__
__
__
__
CLOSE THE GAP
I recently had the pleasure of writing a tutorial for the fine folks over at Smith Micro, the distributors of Clip StudioPaint here in North America. It…Read more
September 28, 2016
__
__
__
__
8 KEYBOARD SHORTCUTS TO CLIP STUDIO PAINT HAPPINESS Keyboard shortcuts are the key to a more fluid experience in using Clip Studio Paint. Here are eight I couldn't live without.…Read more
September 19, 2016
__
__
__
__
SIX WAYS TO ZOOM
How many different ways can you zoom in on something? Six, by my count. I have video to prove it.…Read more
September 11, 2016
__
__
__
__
HOW TO DO A COLOR HOLD When the black lines around a character's head are too distracting, you can color them in with this one simple trick.…Read more
September 6, 2016
__
__
__
__
REMOVE STRAY LINE FROM AN UNKNOWN LAYER Occasionally, you draw something on the wrong layer and can't figure out which layer it's on. How can you remove that mistake? I'll showyou two ways.…
Read more
August 30, 2016
__
__
__
__
10 SITES WITH FREE FONTS FOR LETTERING YOUR COMICS Whether doing simple gag panels, comic strips, or comic books with Clip Studio Paint, you’ll eventually be looking for some good fonts to fill those word balloons,…Read more
July 29, 2016
__
__
__
__
FINDING FONTS EASIER WITH FONT LISTS Picking a font in Clip Studio Paint is not terribly easy, but you can narrow down your choices with some up front work to preparefont…
Read more
July 27, 2016
__
__
__
__
“DO I NEED A WACOM CINTIQ TO USE CLIP STUDIO PAINT?” No, you don't. There are people who even use CSP with a mouse. I wouldn't recommend that, but it's been known to happen. I have…Read more
July 25, 2016
__
__
__
__
DRAWING WORD BALLOONS FROM THE CENTER Drawing word balloons is easier when you can drawn them from the inside out. I'll show you where to find that option.…Read more
July 21, 2016
__
__
__
__
HOW DO I CREATE A TITLE IMAGE? You know those images on websites everywhere with the headline sitting on top of a photograph? You can do that in Clip Studio Paint. Letme…
Read more
July 18, 2016
__
__
__
__
Older Posts __
SOCIAL
__ __ __
__ __
__
SEARCH:
CATEGORIES
* Beginners
* Editorial
* Featured
* Graphic Design
* Meta
* Resources
* The ABCs of CSP
* Tutorial
* Video
PAGES
* About
* Press
ARCHIVES
* February 2017 (1) * January 2017 (1) * December 2016 (1) * November 2016 (1) * October 2016 (1) * September 2016 (4)* August 2016 (1)
* July 2016 (19)
* June 2016 (7)
� 2016 Augie De Blieck Jr. - All Rights Reserved.__
Details
5