1
More Annotations


3


1
Favourite Annotations


6


6
Text
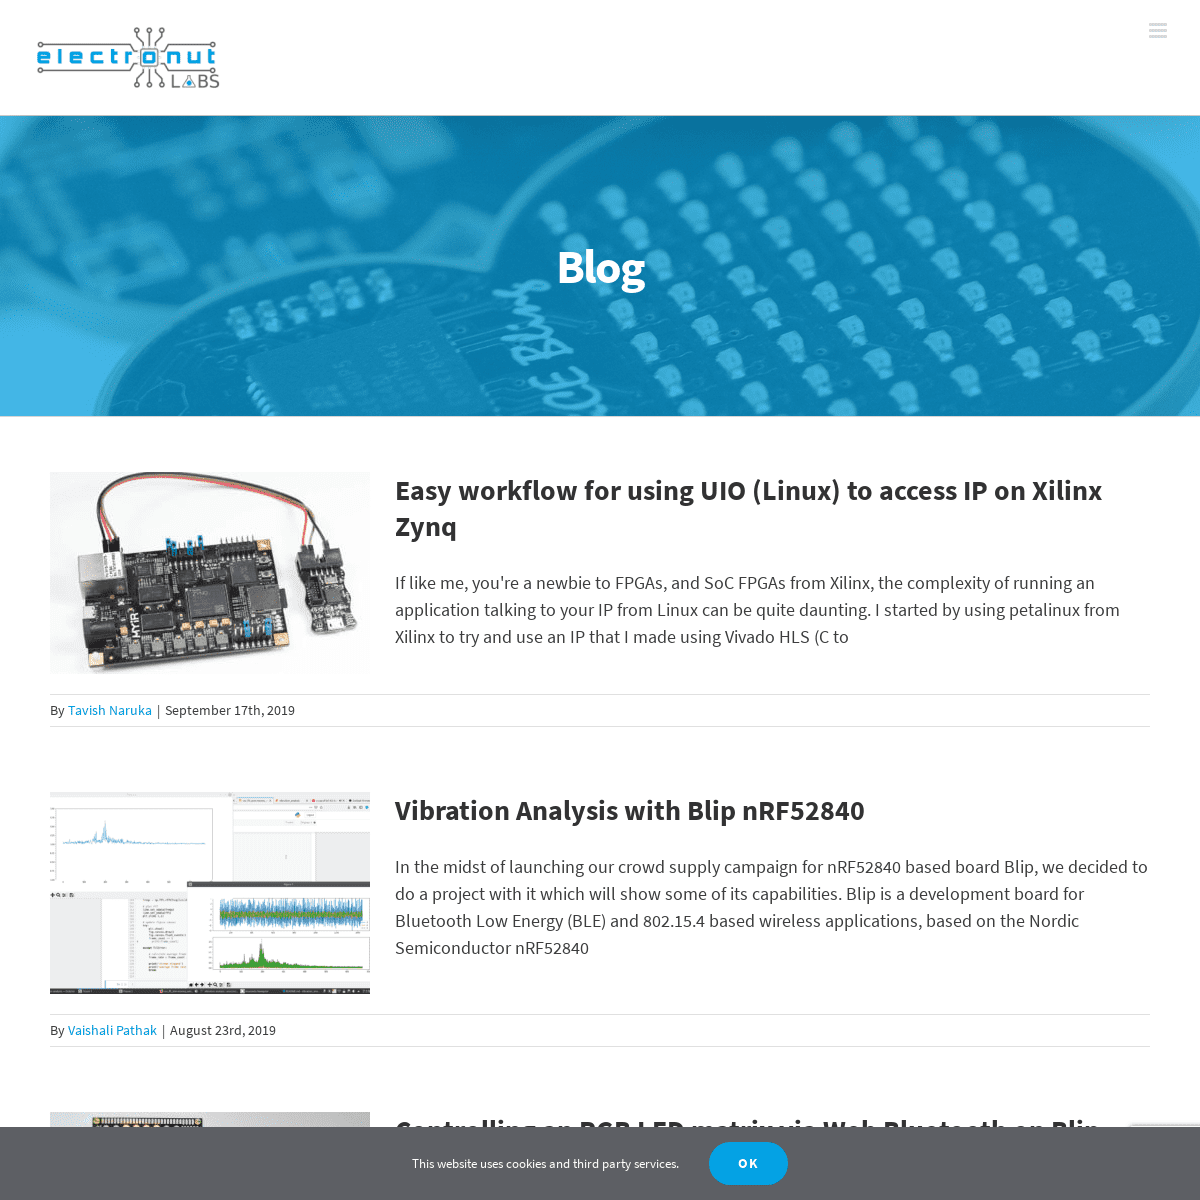
ELECTRONUT · PROGRAMMING & EMBEDDED SYSTEMS Vibration Analysis with Blip nRF52840. In the midst of launching our crowd supply campaign for nRF52840 based board Blip, we decided to do a project with it which will show some of its capabilities. Blip is a development board for Bluetooth Low Energy (BLE) and 802.15.4 based wireless applications, based on the Nordic Semiconductor nRF52840. GETTING STARTED WITH THE ATMEL ATTINY84 MICROCONTROLLER If you liked this article, please consider supporting my efforts by purchasing my book. Python Playground, published by No Starch Press, USA, is a collection of imaginative programming projects that will inspire you to use Python to make art and music, build simulations of real-world phenomena, and interact with hardware like the Arduino and Instagram
Linkedin
This website uses cookies and third party services. Ok
Raspberry Pi.
GETTING STARTED WITH STM32 ARM CORTEX-M3 USING GCC AN2586 Application note – Getting started with STM32F10xxx hardware development. (1) above gives an overview of the chip whereas (2) goes into details – setting up registers and programming the chip. (3) is a handy reference for the Nucleo board, and (4) is helpful when you are designing your own PCB with the chip. GETTING STARTED WITH ATTINY85 (AVR PROGRAMMING) · ELECTRONUT Getting started with ATtiny85 (AVR Programming) 30 Apr 2014. I just got the batch of ATtiny85s I ordered for some pals at a local Maker group. I have articles here on ATtiny84, but not on this chip.So here are some quick notes on getting started with the ATtiny85. A SIMPLE IOT PROJECT WITH THE ESP8266 WIFI MODULE · ELECTRONUT The ESP8266 WiFi Module. The ESP8266 is a WiFi module that costs less than 5 USD. This makes putting your sensors on the net actually feasible. (Hooking up the $75 Arduino Yun to each of your sensors – not no feasible.) There’s a lot of excitement about this sensor on the Internet currently, and people have done an amazing jobdeciphering
PLAYING WITH THREAD AND MQTT-SN ON NORDIC NRF52840 Testing. To test our Thread device, turn the DK on and wait for LED1 to stabilise. Then, press Button 2, which will start looking for an MQTT-SN gateway. When a valid gateway is found, LED 3 will light up. Now press Button 3, and our device will connect to the gateway. Upon successful connection, LED 4 will light up. INSTALLING ARDUINO BOOTLOADER ON AN ATMEGA32U4 · ELECTRONUT Installing Arduino Bootloader on an ATmega32u4 06 Jun 2015. The Atmel ATmega32u4 gained popularity with its use in the Arduino Leonardo, due to the built-in USB support, which made an additional chip unnessaryfor that purpose.
MOTOR CONTROL OVER BLE WITH NRF51822 AND TB6612FNGSEE MORE ONELECTRONUT.IN
PLOTTING ALGORITHMIC TIME COMPLEXITY OF A FUNCTION USING Plotting Algorithmic Time Complexity of a Function using Python 18 Jul 2014. I have been reading Miller & Ranum's e-book on Python/Algorithms. (A superb book which is also free online.) While looking through their chapter on Algorithm Analysis, I took their idea of using the Python Timer and timeit methods a bit forward to create a simple plotting scheme using matplotlib. PLOTTING DHT11 SENSOR DATA AT THINGSPEAK.COM USINGSEE MORE ONELECTRONUT.IN
ELECTRONUT · PROGRAMMING & EMBEDDED SYSTEMS Vibration Analysis with Blip nRF52840. In the midst of launching our crowd supply campaign for nRF52840 based board Blip, we decided to do a project with it which will show some of its capabilities. Blip is a development board for Bluetooth Low Energy (BLE) and 802.15.4 based wireless applications, based on the Nordic Semiconductor nRF52840. GETTING STARTED WITH THE ATMEL ATTINY84 MICROCONTROLLER If you liked this article, please consider supporting my efforts by purchasing my book. Python Playground, published by No Starch Press, USA, is a collection of imaginative programming projects that will inspire you to use Python to make art and music, build simulations of real-world phenomena, and interact with hardware like the Arduino andRaspberry Pi.
GETTING STARTED WITH STM32 ARM CORTEX-M3 USING GCC AN2586 Application note – Getting started with STM32F10xxx hardware development. (1) above gives an overview of the chip whereas (2) goes into details – setting up registers and programming the chip. (3) is a handy reference for the Nucleo board, and (4) is helpful when you are designing your own PCB with the chip. GETTING STARTED WITH ATTINY85 (AVR PROGRAMMING) · ELECTRONUT Getting started with ATtiny85 (AVR Programming) 30 Apr 2014. I just got the batch of ATtiny85s I ordered for some pals at a local Maker group. I have articles here on ATtiny84, but not on this chip.So here are some quick notes on getting started with the ATtiny85. A SIMPLE IOT PROJECT WITH THE ESP8266 WIFI MODULE · ELECTRONUT The ESP8266 WiFi Module. The ESP8266 is a WiFi module that costs less than 5 USD. This makes putting your sensors on the net actually feasible. (Hooking up the $75 Arduino Yun to each of your sensors – not no feasible.) There’s a lot of excitement about this sensor on the Internet currently, and people have done an amazing jobdeciphering
PLAYING WITH THREAD AND MQTT-SN ON NORDIC NRF52840 Testing. To test our Thread device, turn the DK on and wait for LED1 to stabilise. Then, press Button 2, which will start looking for an MQTT-SN gateway. When a valid gateway is found, LED 3 will light up. Now press Button 3, and our device will connect to the gateway. Upon successful connection, LED 4 will light up. INSTALLING ARDUINO BOOTLOADER ON AN ATMEGA32U4 · ELECTRONUT Installing Arduino Bootloader on an ATmega32u4 06 Jun 2015. The Atmel ATmega32u4 gained popularity with its use in the Arduino Leonardo, due to the built-in USB support, which made an additional chip unnessaryfor that purpose.
MOTOR CONTROL OVER BLE WITH NRF51822 AND TB6612FNGSEE MORE ONELECTRONUT.IN
PLOTTING ALGORITHMIC TIME COMPLEXITY OF A FUNCTION USING Plotting Algorithmic Time Complexity of a Function using Python 18 Jul 2014. I have been reading Miller & Ranum's e-book on Python/Algorithms. (A superb book which is also free online.) While looking through their chapter on Algorithm Analysis, I took their idea of using the Python Timer and timeit methods a bit forward to create a simple plotting scheme using matplotlib. PLOTTING DHT11 SENSOR DATA AT THINGSPEAK.COM USINGSEE MORE ONELECTRONUT.IN
CONTROLLING AN RGB LED WITH NORDIC NRF51-DK (NRF51822 Table of Contents IntroductionBackgroundRGB LEDBLE ControlThe Main LoopIn ActionDownloadsReferences Introduction In this project, we will control an RGB LED using the Nordic nRF51-DK over BLE. We will make use of PWM (Pulse Width Modulation) and NUS (Nordic UART Service) for this. Background Before you read further, you might want to GETTING STARTED WITH ZEPHYR RTOS ON NORDIC NRF52832 Getting Started with Zephyr RTOS on Nordic nRF52832 hackaBLE 21 Feb 2019 Introduction. I worked for almost two decades in the software industry. In the early 2000s, I was developing applications on Windows, Linux, and various flavours of Unix. GETTING STARTED WITH ATMEL ATTINY10 · ELECTRONUT The Code. The first thing you want to set is the clock speed. The ATtiny10 doesn’t have any fuses related to that, so you need to set that in the CLKPS register. The default is a prescaler of 8 which puts it at 1 MHz, but we want to run it at 8 MHz. // Set CPU speed by setting clock prescalar: STARTING RASPBERRY PI: WIFI, SSH AND GPIO · ELECTRONUT If you liked this article, please consider supporting my efforts by purchasing my book. Python Playground, published by No Starch Press, USA, is a collection of imaginative programming projects that will inspire you to use Python to make art and music, build simulations of real-world phenomena, and interact with hardware like the Arduino andRaspberry Pi.
MOTOR CONTROL OVER BLE WITH NRF51822 AND TB6612FNG The VMOT pin is the motor power supply, which has to be in the range of 4.5 to 13.5 V. (AO1, AO2) and (BO1, BO2) are output supplies to the two motors. The speed and direction of the motors can be controlled in various ways, as shown in an excerpt from the Toshiba TB6612FNG ATMEGA168 POWER SAVE MODE AND PIN CHANGE INTERRUPT So here, we will be using the “power-save” mode from the above table, and use a pin-change interrupt to wake up from this sleep mode. The setup used is shown below in the 2 schematics I had posted before. The output Vo from the op-amp should be connected to the pin 14 of the ATmega168 (PCINT0/PB0). Also, in this case, we are not usingBLUEY BEACON
Bluey Beacon - Building a Nordic nRF52832 BLE IoT Sensor Beacon 09 Jul 2017. A BLE Beacon. In this project, we’re going to build a BLE Beacon that transmits temperature, humidity and ambient light levels to a dashboard on the internet. EXTERNAL NRF51822 SWD PROGRAMMING USING THE NRF51-DK This is a short note on using the nRF51-DK to program an nRF51822 chip on an external board. So far I have (click to jump to section): nRF51822 modules with the dual 2×9 1.27 mm pins, on an adapter board designed by me in collaboration with Explore Embedded. I will keep adding to this article as I MAKING THE RASPBERRY PI SPEAK · ELECTRONUT If you liked this article, please consider supporting my efforts by purchasing my book. Python Playground, published by No Starch Press, USA, is a collection of imaginative programming projects that will inspire you to use Python to make art and music, build simulations of real-world phenomena, and interact with hardware like the Arduino andRaspberry Pi.
DRIVING WS2812B LEDS USING I2S ON THE NORDIC NRF52832 BLE SOC We need an nRF52832 board, and in this case we are using our beautiful Bluey nRF52 dev board. We’ll use a 16 LED ring of WS2812Bs, and the other piece of hardware we need is a level shifter on the SDOUT line. The above is required because the nRF52832 runs at 3.3 V and the WS2812B data line needs atleast 3.5 V to work reliably. ELECTRONUT · PROGRAMMING & EMBEDDED SYSTEMS Vibration Analysis with Blip nRF52840. In the midst of launching our crowd supply campaign for nRF52840 based board Blip, we decided to do a project with it which will show some of its capabilities. Blip is a development board for Bluetooth Low Energy (BLE) and 802.15.4 based wireless applications, based on the Nordic Semiconductor nRF52840. GETTING STARTED WITH STM32 ARM CORTEX-M3 USING GCC AN2586 Application note – Getting started with STM32F10xxx hardware development. (1) above gives an overview of the chip whereas (2) goes into details – setting up registers and programming the chip. (3) is a handy reference for the Nucleo board, and (4) is helpful when you are designing your own PCB with the chip. A SIMPLE IOT PROJECT WITH THE ESP8266 WIFI MODULE · ELECTRONUT The ESP8266 WiFi Module. The ESP8266 is a WiFi module that costs less than 5 USD. This makes putting your sensors on the net actually feasible. (Hooking up the $75 Arduino Yun to each of your sensors – not no feasible.) There’s a lot of excitement about this sensor on the Internet currently, and people have done an amazing jobdeciphering
GETTING STARTED WITH THE ATMEL ATTINY84 MICROCONTROLLER If you liked this article, please consider supporting my efforts by purchasing my book. Python Playground, published by No Starch Press, USA, is a collection of imaginative programming projects that will inspire you to use Python to make art and music, build simulations of real-world phenomena, and interact with hardware like the Arduino andRaspberry Pi.
PLAYING WITH THREAD AND MQTT-SN ON NORDIC NRF52840 Testing. To test our Thread device, turn the DK on and wait for LED1 to stabilise. Then, press Button 2, which will start looking for an MQTT-SN gateway. When a valid gateway is found, LED 3 will light up. Now press Button 3, and our device will connect to the gateway. Upon successful connection, LED 4 will light up. GETTING STARTED WITH ATTINY85 (AVR PROGRAMMING) · ELECTRONUT Getting started with ATtiny85 (AVR Programming) 30 Apr 2014. I just got the batch of ATtiny85s I ordered for some pals at a local Maker group. I have articles here on ATtiny84, but not on this chip.So here are some quick notes on getting started with the ATtiny85.BLUEY BEACON
INSTALLING ARDUINO BOOTLOADER ON AN ATMEGA32U4 · ELECTRONUT Installing Arduino Bootloader on an ATmega32u4 06 Jun 2015. The Atmel ATmega32u4 gained popularity with its use in the Arduino Leonardo, due to the built-in USB support, which made an additional chip unnessaryfor that purpose.
ATMEGA168 POWER SAVE MODE AND PIN CHANGE INTERRUPT So here, we will be using the “power-save” mode from the above table, and use a pin-change interrupt to wake up from this sleep mode. The setup used is shown below in the 2 schematics I had posted before. The output Vo from the op-amp should be connected to the pin 14 of the ATmega168 (PCINT0/PB0). Also, in this case, we are not using EXTERNAL NRF51822 SWD PROGRAMMING USING THE NRF51-DKSEE MORE ONELECTRONUT.IN
ELECTRONUT · PROGRAMMING & EMBEDDED SYSTEMS Vibration Analysis with Blip nRF52840. In the midst of launching our crowd supply campaign for nRF52840 based board Blip, we decided to do a project with it which will show some of its capabilities. Blip is a development board for Bluetooth Low Energy (BLE) and 802.15.4 based wireless applications, based on the Nordic Semiconductor nRF52840. GETTING STARTED WITH STM32 ARM CORTEX-M3 USING GCC AN2586 Application note – Getting started with STM32F10xxx hardware development. (1) above gives an overview of the chip whereas (2) goes into details – setting up registers and programming the chip. (3) is a handy reference for the Nucleo board, and (4) is helpful when you are designing your own PCB with the chip. A SIMPLE IOT PROJECT WITH THE ESP8266 WIFI MODULE · ELECTRONUT The ESP8266 WiFi Module. The ESP8266 is a WiFi module that costs less than 5 USD. This makes putting your sensors on the net actually feasible. (Hooking up the $75 Arduino Yun to each of your sensors – not no feasible.) There’s a lot of excitement about this sensor on the Internet currently, and people have done an amazing jobdeciphering
GETTING STARTED WITH THE ATMEL ATTINY84 MICROCONTROLLER If you liked this article, please consider supporting my efforts by purchasing my book. Python Playground, published by No Starch Press, USA, is a collection of imaginative programming projects that will inspire you to use Python to make art and music, build simulations of real-world phenomena, and interact with hardware like the Arduino andRaspberry Pi.
PLAYING WITH THREAD AND MQTT-SN ON NORDIC NRF52840 Testing. To test our Thread device, turn the DK on and wait for LED1 to stabilise. Then, press Button 2, which will start looking for an MQTT-SN gateway. When a valid gateway is found, LED 3 will light up. Now press Button 3, and our device will connect to the gateway. Upon successful connection, LED 4 will light up. GETTING STARTED WITH ATTINY85 (AVR PROGRAMMING) · ELECTRONUT Getting started with ATtiny85 (AVR Programming) 30 Apr 2014. I just got the batch of ATtiny85s I ordered for some pals at a local Maker group. I have articles here on ATtiny84, but not on this chip.So here are some quick notes on getting started with the ATtiny85.BLUEY BEACON
INSTALLING ARDUINO BOOTLOADER ON AN ATMEGA32U4 · ELECTRONUT Installing Arduino Bootloader on an ATmega32u4 06 Jun 2015. The Atmel ATmega32u4 gained popularity with its use in the Arduino Leonardo, due to the built-in USB support, which made an additional chip unnessaryfor that purpose.
ATMEGA168 POWER SAVE MODE AND PIN CHANGE INTERRUPT So here, we will be using the “power-save” mode from the above table, and use a pin-change interrupt to wake up from this sleep mode. The setup used is shown below in the 2 schematics I had posted before. The output Vo from the op-amp should be connected to the pin 14 of the ATmega168 (PCINT0/PB0). Also, in this case, we are not using EXTERNAL NRF51822 SWD PROGRAMMING USING THE NRF51-DKSEE MORE ONELECTRONUT.IN
GETTING STARTED WITH ATTINY85 (AVR PROGRAMMING) · ELECTRONUT Getting started with ATtiny85 (AVR Programming) 30 Apr 2014. I just got the batch of ATtiny85s I ordered for some pals at a local Maker group. I have articles here on ATtiny84, but not on this chip.So here are some quick notes on getting started with the ATtiny85. GETTING STARTED WITH ATMEL ATTINY10 · ELECTRONUT The Code. The first thing you want to set is the clock speed. The ATtiny10 doesn’t have any fuses related to that, so you need to set that in the CLKPS register. The default is a prescaler of 8 which puts it at 1 MHz, but we want to run it at 8 MHz. // Set CPU speed by setting clock prescalar: TEMPERATURE/ALTITUDE/PRESSURE DISPLAY USING BMP180 gotten around to building a display around it. This project uses an Arduino Pro Mini 3.3 V clone, a BMP180 sensor and a. Nokia 5110 LCD module to display the current temperature, altitude and. pressure. Here is the schematic for the project: The circuit STARTING RASPBERRY PI: WIFI, SSH AND GPIO · ELECTRONUT If you liked this article, please consider supporting my efforts by purchasing my book. Python Playground, published by No Starch Press, USA, is a collection of imaginative programming projects that will inspire you to use Python to make art and music, build simulations of real-world phenomena, and interact with hardware like the Arduino andRaspberry Pi.
CONTROLLING AN RGB LED WITH NORDIC NRF51-DK (NRF51822 Table of Contents IntroductionBackgroundRGB LEDBLE ControlThe Main LoopIn ActionDownloadsReferences Introduction In this project, we will control an RGB LED using the Nordic nRF51-DK over BLE. We will make use of PWM (Pulse Width Modulation) and NUS (Nordic UART Service) for this. Background Before you read further, you might want to TALKING TO MMA7660 USING I2C AND ATTINY85 · ELECTRONUT When the above dialog first comes up, you need to select ICE in Tool, ISP in Interface and hit apply. You should be able to now read the signature of the chip (for ATtiny85, it’s 0x1e930b) and see the target voltage of 3.3V. Now, select the memories tab, and you will see options for erasing and programming the chip. MAKING THE RASPBERRY PI SPEAK · ELECTRONUT If you liked this article, please consider supporting my efforts by purchasing my book. Python Playground, published by No Starch Press, USA, is a collection of imaginative programming projects that will inspire you to use Python to make art and music, build simulations of real-world phenomena, and interact with hardware like the Arduino andRaspberry Pi.
MOTOR CONTROL OVER BLE WITH NRF51822 AND TB6612FNG The VMOT pin is the motor power supply, which has to be in the range of 4.5 to 13.5 V. (AO1, AO2) and (BO1, BO2) are output supplies to the two motors. The speed and direction of the motors can be controlled in various ways, as shown in an excerpt from the Toshiba TB6612FNG DRIVING WS2812B LEDS USING I2S ON THE NORDIC NRF52832 BLE Driving WS2812B LEDs using I2S on the Nordic nRF52832 BLE SoC 18 Aug 2017. It’s hard not to like a project with blinking LEDs. Red, Green, Blue, Yellow, and then there are RGB LEDs where you have three lines to control the colour. PLOTTING DHT11 SENSOR DATA AT THINGSPEAK.COM USING Plotting DHT11 sensor data at ThingSpeak.com using Raspberry Pi Model A+ 14 Dec 2014. Internet Of Things. Feeling left behind, I too want to get on board the Internet Of Things bandwagon by putting a sensor on the net. For this experiment, I decided to attach a DHT11 Temperature/Humidity sensor to a Raspberry Pi Model B+ and use thingspeak.com to plot the data. ELECTRONUT · PROGRAMMING & EMBEDDED SYSTEMS Vibration Analysis with Blip nRF52840. In the midst of launching our crowd supply campaign for nRF52840 based board Blip, we decided to do a project with it which will show some of its capabilities. Blip is a development board for Bluetooth Low Energy (BLE) and 802.15.4 based wireless applications, based on the Nordic Semiconductor nRF52840. GETTING STARTED WITH THE ATMEL ATTINY84 MICROCONTROLLER If you liked this article, please consider supporting my efforts by purchasing my book. Python Playground, published by No Starch Press, USA, is a collection of imaginative programming projects that will inspire you to use Python to make art and music, build simulations of real-world phenomena, and interact with hardware like the Arduino andRaspberry Pi.
GETTING STARTED WITH STM32 ARM CORTEX-M3 USING GCC AN2586 Application note – Getting started with STM32F10xxx hardware development. (1) above gives an overview of the chip whereas (2) goes into details – setting up registers and programming the chip. (3) is a handy reference for the Nucleo board, and (4) is helpful when you are designing your own PCB with the chip. GETTING STARTED WITH ATTINY85 (AVR PROGRAMMING) · ELECTRONUT Getting started with ATtiny85 (AVR Programming) 30 Apr 2014. I just got the batch of ATtiny85s I ordered for some pals at a local Maker group. I have articles here on ATtiny84, but not on this chip.So here are some quick notes on getting started with the ATtiny85. PLAYING WITH THREAD AND MQTT-SN ON NORDIC NRF52840 Testing. To test our Thread device, turn the DK on and wait for LED1 to stabilise. Then, press Button 2, which will start looking for an MQTT-SN gateway. When a valid gateway is found, LED 3 will light up. Now press Button 3, and our device will connect to the gateway. Upon successful connection, LED 4 will light up. TEMPERATURE/ALTITUDE/PRESSURE DISPLAY USING BMP180 gotten around to building a display around it. This project uses an Arduino Pro Mini 3.3 V clone, a BMP180 sensor and a. Nokia 5110 LCD module to display the current temperature, altitude and. pressure. Here is the schematic for the project: The circuit INSTALLING ARDUINO BOOTLOADER ON AN ATMEGA32U4 · ELECTRONUT Installing Arduino Bootloader on an ATmega32u4 06 Jun 2015. The Atmel ATmega32u4 gained popularity with its use in the Arduino Leonardo, due to the built-in USB support, which made an additional chip unnessaryfor that purpose.
ATMEGA168 POWER SAVE MODE AND PIN CHANGE INTERRUPT So here, we will be using the “power-save” mode from the above table, and use a pin-change interrupt to wake up from this sleep mode. The setup used is shown below in the 2 schematics I had posted before. The output Vo from the op-amp should be connected to the pin 14 of the ATmega168 (PCINT0/PB0). Also, in this case, we are not using PLOTTING ALGORITHMIC TIME COMPLEXITY OF A FUNCTION USING Plotting Algorithmic Time Complexity of a Function using Python 18 Jul 2014. I have been reading Miller & Ranum's e-book on Python/Algorithms. (A superb book which is also free online.) While looking through their chapter on Algorithm Analysis, I took their idea of using the Python Timer and timeit methods a bit forward to create a simple plotting scheme using matplotlib. PLOTTING DHT11 SENSOR DATA AT THINGSPEAK.COM USINGSEE MORE ONELECTRONUT.IN
ELECTRONUT · PROGRAMMING & EMBEDDED SYSTEMS Vibration Analysis with Blip nRF52840. In the midst of launching our crowd supply campaign for nRF52840 based board Blip, we decided to do a project with it which will show some of its capabilities. Blip is a development board for Bluetooth Low Energy (BLE) and 802.15.4 based wireless applications, based on the Nordic Semiconductor nRF52840. GETTING STARTED WITH THE ATMEL ATTINY84 MICROCONTROLLER If you liked this article, please consider supporting my efforts by purchasing my book. Python Playground, published by No Starch Press, USA, is a collection of imaginative programming projects that will inspire you to use Python to make art and music, build simulations of real-world phenomena, and interact with hardware like the Arduino andRaspberry Pi.
GETTING STARTED WITH STM32 ARM CORTEX-M3 USING GCC AN2586 Application note – Getting started with STM32F10xxx hardware development. (1) above gives an overview of the chip whereas (2) goes into details – setting up registers and programming the chip. (3) is a handy reference for the Nucleo board, and (4) is helpful when you are designing your own PCB with the chip. GETTING STARTED WITH ATTINY85 (AVR PROGRAMMING) · ELECTRONUT Getting started with ATtiny85 (AVR Programming) 30 Apr 2014. I just got the batch of ATtiny85s I ordered for some pals at a local Maker group. I have articles here on ATtiny84, but not on this chip.So here are some quick notes on getting started with the ATtiny85. PLAYING WITH THREAD AND MQTT-SN ON NORDIC NRF52840 Testing. To test our Thread device, turn the DK on and wait for LED1 to stabilise. Then, press Button 2, which will start looking for an MQTT-SN gateway. When a valid gateway is found, LED 3 will light up. Now press Button 3, and our device will connect to the gateway. Upon successful connection, LED 4 will light up. TEMPERATURE/ALTITUDE/PRESSURE DISPLAY USING BMP180 gotten around to building a display around it. This project uses an Arduino Pro Mini 3.3 V clone, a BMP180 sensor and a. Nokia 5110 LCD module to display the current temperature, altitude and. pressure. Here is the schematic for the project: The circuit INSTALLING ARDUINO BOOTLOADER ON AN ATMEGA32U4 · ELECTRONUT Installing Arduino Bootloader on an ATmega32u4 06 Jun 2015. The Atmel ATmega32u4 gained popularity with its use in the Arduino Leonardo, due to the built-in USB support, which made an additional chip unnessaryfor that purpose.
ATMEGA168 POWER SAVE MODE AND PIN CHANGE INTERRUPT So here, we will be using the “power-save” mode from the above table, and use a pin-change interrupt to wake up from this sleep mode. The setup used is shown below in the 2 schematics I had posted before. The output Vo from the op-amp should be connected to the pin 14 of the ATmega168 (PCINT0/PB0). Also, in this case, we are not using PLOTTING ALGORITHMIC TIME COMPLEXITY OF A FUNCTION USING Plotting Algorithmic Time Complexity of a Function using Python 18 Jul 2014. I have been reading Miller & Ranum's e-book on Python/Algorithms. (A superb book which is also free online.) While looking through their chapter on Algorithm Analysis, I took their idea of using the Python Timer and timeit methods a bit forward to create a simple plotting scheme using matplotlib. PLOTTING DHT11 SENSOR DATA AT THINGSPEAK.COM USINGSEE MORE ONELECTRONUT.IN
ABOUT · ELECTRONUT
About. electronut is a culmination of my interests in programming and embedded systems. I started writing about my experiments with embedded hardware in 2010, and in 2015, No Starch Press published my book Python Playground.. From 2016 to 2019 I ran a small consulting firm called Electronut Labs. GETTING STARTED WITH ATTINY85 (AVR PROGRAMMING) · ELECTRONUT Getting started with ATtiny85 (AVR Programming) 30 Apr 2014. I just got the batch of ATtiny85s I ordered for some pals at a local Maker group. I have articles here on ATtiny84, but not on this chip.So here are some quick notes on getting started with the ATtiny85. GETTING STARTED WITH STM32 ARM CORTEX-M3 USING GCC AN2586 Application note – Getting started with STM32F10xxx hardware development. (1) above gives an overview of the chip whereas (2) goes into details – setting up registers and programming the chip. (3) is a handy reference for the Nucleo board, and (4) is helpful when you are designing your own PCB with the chip. A SIMPLE IOT PROJECT WITH THE ESP8266 WIFI MODULE · ELECTRONUT The ESP8266 WiFi Module. The ESP8266 is a WiFi module that costs less than 5 USD. This makes putting your sensors on the net actually feasible. (Hooking up the $75 Arduino Yun to each of your sensors – not no feasible.) There’s a lot of excitement about this sensor on the Internet currently, and people have done an amazing jobdeciphering
BLUEY BEACON
Bluey Beacon - Building a Nordic nRF52832 BLE IoT Sensor Beacon 09 Jul 2017. A BLE Beacon. In this project, we’re going to build a BLE Beacon that transmits temperature, humidity and ambient light levels to a dashboard on the internet. TALKING TO MMA7660 USING I2C AND ATTINY85 · ELECTRONUT When the above dialog first comes up, you need to select ICE in Tool, ISP in Interface and hit apply. You should be able to now read the signature of the chip (for ATtiny85, it’s 0x1e930b) and see the target voltage of 3.3V. Now, select the memories tab, and you will see options for erasing and programming the chip. CONTROLLING AN RGB LED WITH NORDIC NRF51-DK (NRF51822 Table of Contents IntroductionBackgroundRGB LEDBLE ControlThe Main LoopIn ActionDownloadsReferences Introduction In this project, we will control an RGB LED using the Nordic nRF51-DK over BLE. We will make use of PWM (Pulse Width Modulation) and NUS (Nordic UART Service) for this. Background Before you read further, you might want to PLAYING WITH THREAD AND MQTT-SN ON NORDIC NRF52840 Playing with Thread and MQTT-SN on Nordic nRF52840 11 Aug 2018 Introduction. IoT is in the air. Impossible to surf the web in peace without tripping over some gushy article on billions of devices connecting to the Internet. TALKING TO A RASPBERRY PI FROM YOUR PHONE USING BOTTLE If you liked this article, please consider supporting my efforts by purchasing my book. Python Playground, published by No Starch Press, USA, is a collection of imaginative programming projects that will inspire you to use Python to make art and music, build simulations of real-world phenomena, and interact with hardware like the Arduino andRaspberry Pi.
NORDIC NRF52840 QR CODE BASED THREAD COMMISSIONING Nordic nRF52840 QR Code based Thread Commissioning 15 Aug 2018 Introduction. I recently wrote about using Thread and MQTT-SN on the Nordic nRF52840 multiprotocol SoC. One thing I did not cover in detail is Thread Commisioning - a secure process by which a device joins a Thread network. I side-stepped the process by passing the network credentials directly to the device using the ELECTRONUT · PROGRAMMING & EMBEDDED SYSTEMS Vibration Analysis with Blip nRF52840. In the midst of launching our crowd supply campaign for nRF52840 based board Blip, we decided to do a project with it which will show some of its capabilities. Blip is a development board for Bluetooth Low Energy (BLE) and 802.15.4 based wireless applications, based on the Nordic Semiconductor nRF52840. GETTING STARTED WITH THE ATMEL ATTINY84 MICROCONTROLLER If you liked this article, please consider supporting my efforts by purchasing my book. Python Playground, published by No Starch Press, USA, is a collection of imaginative programming projects that will inspire you to use Python to make art and music, build simulations of real-world phenomena, and interact with hardware like the Arduino andRaspberry Pi.
GETTING STARTED WITH STM32 ARM CORTEX-M3 USING GCC AN2586 Application note – Getting started with STM32F10xxx hardware development. (1) above gives an overview of the chip whereas (2) goes into details – setting up registers and programming the chip. (3) is a handy reference for the Nucleo board, and (4) is helpful when you are designing your own PCB with the chip. GETTING STARTED WITH ATTINY85 (AVR PROGRAMMING) · ELECTRONUT Getting started with ATtiny85 (AVR Programming) 30 Apr 2014. I just got the batch of ATtiny85s I ordered for some pals at a local Maker group. I have articles here on ATtiny84, but not on this chip.So here are some quick notes on getting started with the ATtiny85. PLAYING WITH THREAD AND MQTT-SN ON NORDIC NRF52840 Testing. To test our Thread device, turn the DK on and wait for LED1 to stabilise. Then, press Button 2, which will start looking for an MQTT-SN gateway. When a valid gateway is found, LED 3 will light up. Now press Button 3, and our device will connect to the gateway. Upon successful connection, LED 4 will light up. TEMPERATURE/ALTITUDE/PRESSURE DISPLAY USING BMP180 gotten around to building a display around it. This project uses an Arduino Pro Mini 3.3 V clone, a BMP180 sensor and a. Nokia 5110 LCD module to display the current temperature, altitude and. pressure. Here is the schematic for the project: The circuit INSTALLING ARDUINO BOOTLOADER ON AN ATMEGA32U4 · ELECTRONUT Installing Arduino Bootloader on an ATmega32u4 06 Jun 2015. The Atmel ATmega32u4 gained popularity with its use in the Arduino Leonardo, due to the built-in USB support, which made an additional chip unnessaryfor that purpose.
ATMEGA168 POWER SAVE MODE AND PIN CHANGE INTERRUPT So here, we will be using the “power-save” mode from the above table, and use a pin-change interrupt to wake up from this sleep mode. The setup used is shown below in the 2 schematics I had posted before. The output Vo from the op-amp should be connected to the pin 14 of the ATmega168 (PCINT0/PB0). Also, in this case, we are not using PLOTTING ALGORITHMIC TIME COMPLEXITY OF A FUNCTION USING Plotting Algorithmic Time Complexity of a Function using Python 18 Jul 2014. I have been reading Miller & Ranum's e-book on Python/Algorithms. (A superb book which is also free online.) While looking through their chapter on Algorithm Analysis, I took their idea of using the Python Timer and timeit methods a bit forward to create a simple plotting scheme using matplotlib. PLOTTING DHT11 SENSOR DATA AT THINGSPEAK.COM USINGSEE MORE ONELECTRONUT.IN
ELECTRONUT · PROGRAMMING & EMBEDDED SYSTEMS Vibration Analysis with Blip nRF52840. In the midst of launching our crowd supply campaign for nRF52840 based board Blip, we decided to do a project with it which will show some of its capabilities. Blip is a development board for Bluetooth Low Energy (BLE) and 802.15.4 based wireless applications, based on the Nordic Semiconductor nRF52840. GETTING STARTED WITH THE ATMEL ATTINY84 MICROCONTROLLER If you liked this article, please consider supporting my efforts by purchasing my book. Python Playground, published by No Starch Press, USA, is a collection of imaginative programming projects that will inspire you to use Python to make art and music, build simulations of real-world phenomena, and interact with hardware like the Arduino andRaspberry Pi.
GETTING STARTED WITH STM32 ARM CORTEX-M3 USING GCC AN2586 Application note – Getting started with STM32F10xxx hardware development. (1) above gives an overview of the chip whereas (2) goes into details – setting up registers and programming the chip. (3) is a handy reference for the Nucleo board, and (4) is helpful when you are designing your own PCB with the chip. GETTING STARTED WITH ATTINY85 (AVR PROGRAMMING) · ELECTRONUT Getting started with ATtiny85 (AVR Programming) 30 Apr 2014. I just got the batch of ATtiny85s I ordered for some pals at a local Maker group. I have articles here on ATtiny84, but not on this chip.So here are some quick notes on getting started with the ATtiny85. PLAYING WITH THREAD AND MQTT-SN ON NORDIC NRF52840 Testing. To test our Thread device, turn the DK on and wait for LED1 to stabilise. Then, press Button 2, which will start looking for an MQTT-SN gateway. When a valid gateway is found, LED 3 will light up. Now press Button 3, and our device will connect to the gateway. Upon successful connection, LED 4 will light up. TEMPERATURE/ALTITUDE/PRESSURE DISPLAY USING BMP180 gotten around to building a display around it. This project uses an Arduino Pro Mini 3.3 V clone, a BMP180 sensor and a. Nokia 5110 LCD module to display the current temperature, altitude and. pressure. Here is the schematic for the project: The circuit INSTALLING ARDUINO BOOTLOADER ON AN ATMEGA32U4 · ELECTRONUT Installing Arduino Bootloader on an ATmega32u4 06 Jun 2015. The Atmel ATmega32u4 gained popularity with its use in the Arduino Leonardo, due to the built-in USB support, which made an additional chip unnessaryfor that purpose.
ATMEGA168 POWER SAVE MODE AND PIN CHANGE INTERRUPT So here, we will be using the “power-save” mode from the above table, and use a pin-change interrupt to wake up from this sleep mode. The setup used is shown below in the 2 schematics I had posted before. The output Vo from the op-amp should be connected to the pin 14 of the ATmega168 (PCINT0/PB0). Also, in this case, we are not using PLOTTING ALGORITHMIC TIME COMPLEXITY OF A FUNCTION USING Plotting Algorithmic Time Complexity of a Function using Python 18 Jul 2014. I have been reading Miller & Ranum's e-book on Python/Algorithms. (A superb book which is also free online.) While looking through their chapter on Algorithm Analysis, I took their idea of using the Python Timer and timeit methods a bit forward to create a simple plotting scheme using matplotlib. PLOTTING DHT11 SENSOR DATA AT THINGSPEAK.COM USINGSEE MORE ONELECTRONUT.IN
ABOUT · ELECTRONUT
About. electronut is a culmination of my interests in programming and embedded systems. I started writing about my experiments with embedded hardware in 2010, and in 2015, No Starch Press published my book Python Playground.. From 2016 to 2019 I ran a small consulting firm called Electronut Labs. GETTING STARTED WITH ATTINY85 (AVR PROGRAMMING) · ELECTRONUT Getting started with ATtiny85 (AVR Programming) 30 Apr 2014. I just got the batch of ATtiny85s I ordered for some pals at a local Maker group. I have articles here on ATtiny84, but not on this chip.So here are some quick notes on getting started with the ATtiny85. GETTING STARTED WITH STM32 ARM CORTEX-M3 USING GCC AN2586 Application note – Getting started with STM32F10xxx hardware development. (1) above gives an overview of the chip whereas (2) goes into details – setting up registers and programming the chip. (3) is a handy reference for the Nucleo board, and (4) is helpful when you are designing your own PCB with the chip. A SIMPLE IOT PROJECT WITH THE ESP8266 WIFI MODULE · ELECTRONUT The ESP8266 WiFi Module. The ESP8266 is a WiFi module that costs less than 5 USD. This makes putting your sensors on the net actually feasible. (Hooking up the $75 Arduino Yun to each of your sensors – not no feasible.) There’s a lot of excitement about this sensor on the Internet currently, and people have done an amazing jobdeciphering
BLUEY BEACON
Bluey Beacon - Building a Nordic nRF52832 BLE IoT Sensor Beacon 09 Jul 2017. A BLE Beacon. In this project, we’re going to build a BLE Beacon that transmits temperature, humidity and ambient light levels to a dashboard on the internet. TALKING TO MMA7660 USING I2C AND ATTINY85 · ELECTRONUT When the above dialog first comes up, you need to select ICE in Tool, ISP in Interface and hit apply. You should be able to now read the signature of the chip (for ATtiny85, it’s 0x1e930b) and see the target voltage of 3.3V. Now, select the memories tab, and you will see options for erasing and programming the chip. CONTROLLING AN RGB LED WITH NORDIC NRF51-DK (NRF51822 Table of Contents IntroductionBackgroundRGB LEDBLE ControlThe Main LoopIn ActionDownloadsReferences Introduction In this project, we will control an RGB LED using the Nordic nRF51-DK over BLE. We will make use of PWM (Pulse Width Modulation) and NUS (Nordic UART Service) for this. Background Before you read further, you might want to PLAYING WITH THREAD AND MQTT-SN ON NORDIC NRF52840 Playing with Thread and MQTT-SN on Nordic nRF52840 11 Aug 2018 Introduction. IoT is in the air. Impossible to surf the web in peace without tripping over some gushy article on billions of devices connecting to the Internet. TALKING TO A RASPBERRY PI FROM YOUR PHONE USING BOTTLE If you liked this article, please consider supporting my efforts by purchasing my book. Python Playground, published by No Starch Press, USA, is a collection of imaginative programming projects that will inspire you to use Python to make art and music, build simulations of real-world phenomena, and interact with hardware like the Arduino andRaspberry Pi.
NORDIC NRF52840 QR CODE BASED THREAD COMMISSIONING Nordic nRF52840 QR Code based Thread Commissioning 15 Aug 2018 Introduction. I recently wrote about using Thread and MQTT-SN on the Nordic nRF52840 multiprotocol SoC. One thing I did not cover in detail is Thread Commisioning - a secure process by which a device joins a Thread network. I side-stepped the process by passing the network credentials directly to the device using the ELECTRONUT · PROGRAMMING & EMBEDDED SYSTEMS Vibration Analysis with Blip nRF52840. In the midst of launching our crowd supply campaign for nRF52840 based board Blip, we decided to do a project with it which will show some of its capabilities. Blip is a development board for Bluetooth Low Energy (BLE) and 802.15.4 based wireless applications, based on the Nordic Semiconductor nRF52840. GETTING STARTED WITH THE ATMEL ATTINY84 MICROCONTROLLER If you liked this article, please consider supporting my efforts by purchasing my book. Python Playground, published by No Starch Press, USA, is a collection of imaginative programming projects that will inspire you to use Python to make art and music, build simulations of real-world phenomena, and interact with hardware like the Arduino andRaspberry Pi.
GETTING STARTED WITH STM32 ARM CORTEX-M3 USING GCC AN2586 Application note – Getting started with STM32F10xxx hardware development. (1) above gives an overview of the chip whereas (2) goes into details – setting up registers and programming the chip. (3) is a handy reference for the Nucleo board, and (4) is helpful when you are designing your own PCB with the chip. GETTING STARTED WITH ATTINY85 (AVR PROGRAMMING) · ELECTRONUT Getting started with ATtiny85 (AVR Programming) 30 Apr 2014. I just got the batch of ATtiny85s I ordered for some pals at a local Maker group. I have articles here on ATtiny84, but not on this chip.So here are some quick notes on getting started with the ATtiny85. A SIMPLE IOT PROJECT WITH THE ESP8266 WIFI MODULE · ELECTRONUT The ESP8266 WiFi Module. The ESP8266 is a WiFi module that costs less than 5 USD. This makes putting your sensors on the net actually feasible. (Hooking up the $75 Arduino Yun to each of your sensors – not no feasible.) There’s a lot of excitement about this sensor on the Internet currently, and people have done an amazing jobdeciphering
TEMPERATURE/ALTITUDE/PRESSURE DISPLAY USING BMP180 gotten around to building a display around it. This project uses an Arduino Pro Mini 3.3 V clone, a BMP180 sensor and a. Nokia 5110 LCD module to display the current temperature, altitude and. pressure. Here is the schematic for the project: The circuit INSTALLING ARDUINO BOOTLOADER ON AN ATMEGA32U4 · ELECTRONUT Installing Arduino Bootloader on an ATmega32u4 06 Jun 2015. The Atmel ATmega32u4 gained popularity with its use in the Arduino Leonardo, due to the built-in USB support, which made an additional chip unnessaryfor that purpose.
ATMEGA168 POWER SAVE MODE AND PIN CHANGE INTERRUPT So here, we will be using the “power-save” mode from the above table, and use a pin-change interrupt to wake up from this sleep mode. The setup used is shown below in the 2 schematics I had posted before. The output Vo from the op-amp should be connected to the pin 14 of the ATmega168 (PCINT0/PB0). Also, in this case, we are not using EXTERNAL NRF51822 SWD PROGRAMMING USING THE NRF51-DKSEE MORE ONELECTRONUT.IN
PLOTTING DHT11 SENSOR DATA AT THINGSPEAK.COM USINGSEE MORE ONELECTRONUT.IN
ELECTRONUT · PROGRAMMING & EMBEDDED SYSTEMS Vibration Analysis with Blip nRF52840. In the midst of launching our crowd supply campaign for nRF52840 based board Blip, we decided to do a project with it which will show some of its capabilities. Blip is a development board for Bluetooth Low Energy (BLE) and 802.15.4 based wireless applications, based on the Nordic Semiconductor nRF52840. GETTING STARTED WITH THE ATMEL ATTINY84 MICROCONTROLLER If you liked this article, please consider supporting my efforts by purchasing my book. Python Playground, published by No Starch Press, USA, is a collection of imaginative programming projects that will inspire you to use Python to make art and music, build simulations of real-world phenomena, and interact with hardware like the Arduino andRaspberry Pi.
GETTING STARTED WITH STM32 ARM CORTEX-M3 USING GCC AN2586 Application note – Getting started with STM32F10xxx hardware development. (1) above gives an overview of the chip whereas (2) goes into details – setting up registers and programming the chip. (3) is a handy reference for the Nucleo board, and (4) is helpful when you are designing your own PCB with the chip. GETTING STARTED WITH ATTINY85 (AVR PROGRAMMING) · ELECTRONUT Getting started with ATtiny85 (AVR Programming) 30 Apr 2014. I just got the batch of ATtiny85s I ordered for some pals at a local Maker group. I have articles here on ATtiny84, but not on this chip.So here are some quick notes on getting started with the ATtiny85. A SIMPLE IOT PROJECT WITH THE ESP8266 WIFI MODULE · ELECTRONUT The ESP8266 WiFi Module. The ESP8266 is a WiFi module that costs less than 5 USD. This makes putting your sensors on the net actually feasible. (Hooking up the $75 Arduino Yun to each of your sensors – not no feasible.) There’s a lot of excitement about this sensor on the Internet currently, and people have done an amazing jobdeciphering
TEMPERATURE/ALTITUDE/PRESSURE DISPLAY USING BMP180 gotten around to building a display around it. This project uses an Arduino Pro Mini 3.3 V clone, a BMP180 sensor and a. Nokia 5110 LCD module to display the current temperature, altitude and. pressure. Here is the schematic for the project: The circuit INSTALLING ARDUINO BOOTLOADER ON AN ATMEGA32U4 · ELECTRONUT Installing Arduino Bootloader on an ATmega32u4 06 Jun 2015. The Atmel ATmega32u4 gained popularity with its use in the Arduino Leonardo, due to the built-in USB support, which made an additional chip unnessaryfor that purpose.
ATMEGA168 POWER SAVE MODE AND PIN CHANGE INTERRUPT So here, we will be using the “power-save” mode from the above table, and use a pin-change interrupt to wake up from this sleep mode. The setup used is shown below in the 2 schematics I had posted before. The output Vo from the op-amp should be connected to the pin 14 of the ATmega168 (PCINT0/PB0). Also, in this case, we are not using EXTERNAL NRF51822 SWD PROGRAMMING USING THE NRF51-DKSEE MORE ONELECTRONUT.IN
PLOTTING DHT11 SENSOR DATA AT THINGSPEAK.COM USINGSEE MORE ONELECTRONUT.IN
ABOUT · ELECTRONUT
About. electronut is a culmination of my interests in programming and embedded systems. I started writing about my experiments with embedded hardware in 2010, and in 2015, No Starch Press published my book Python Playground.. From 2016 to 2019 I ran a small consulting firm called Electronut Labs. GETTING STARTED WITH STM32 ARM CORTEX-M3 USING GCC AN2586 Application note – Getting started with STM32F10xxx hardware development. (1) above gives an overview of the chip whereas (2) goes into details – setting up registers and programming the chip. (3) is a handy reference for the Nucleo board, and (4) is helpful when you are designing your own PCB with the chip.BLUEY BEACON
Bluey Beacon - Building a Nordic nRF52832 BLE IoT Sensor Beacon 09 Jul 2017. A BLE Beacon. In this project, we’re going to build a BLE Beacon that transmits temperature, humidity and ambient light levels to a dashboard on the internet. GETTING STARTED WITH ATMEL ATTINY10 · ELECTRONUT The Code. The first thing you want to set is the clock speed. The ATtiny10 doesn’t have any fuses related to that, so you need to set that in the CLKPS register. The default is a prescaler of 8 which puts it at 1 MHz, but we want to run it at 8 MHz. // Set CPU speed by setting clock prescalar: GETTING STARTED WITH ZEPHYR RTOS ON NORDIC NRF52832 Getting Started with Zephyr RTOS on Nordic nRF52832 hackaBLE 21 Feb 2019 Introduction. I worked for almost two decades in the software industry. In the early 2000s, I was developing applications on Windows, Linux, and various flavours of Unix. PLOTTING ALGORITHMIC TIME COMPLEXITY OF A FUNCTION USING Plotting Algorithmic Time Complexity of a Function using Python 18 Jul 2014. I have been reading Miller & Ranum's e-book on Python/Algorithms. (A superb book which is also free online.) While looking through their chapter on Algorithm Analysis, I took their idea of using the Python Timer and timeit methods a bit forward to create a simple plotting scheme using matplotlib. SIMPLE AUDIO RECOGNITION ON A RASPBERRY PI USING MACHINE In the above code, get_spectrogram is a function that is mapped over a TensorFlow DataSet to compute the spectrogram from the normalised audio data. In the original code, the STFT was computed using the TensorFlow tf.signal.stft function. But here’s the problem – PLAYING WITH THREAD AND MQTT-SN ON NORDIC NRF52840 Playing with Thread and MQTT-SN on Nordic nRF52840 11 Aug 2018 Introduction. IoT is in the air. Impossible to surf the web in peace without tripping over some gushy article on billions of devices connecting to the Internet. NORDIC NRF52840 QR CODE BASED THREAD COMMISSIONING Nordic nRF52840 QR Code based Thread Commissioning 15 Aug 2018 Introduction. I recently wrote about using Thread and MQTT-SN on the Nordic nRF52840 multiprotocol SoC. One thing I did not cover in detail is Thread Commisioning - a secure process by which a device joins a Thread network. I side-stepped the process by passing the network credentials directly to the device using theELECTRONUT LABS
Electronut Labs B o ar d d i m e ns i o ns R e f e r e nc e s : 1. Getting started guide for Blip - h ttps://docs.electronut.in/blip/ ELECTRONUT · PROGRAMMING & EMBEDDED SYSTEMS Vibration Analysis with Blip nRF52840. In the midst of launching our crowd supply campaign for nRF52840 based board Blip, we decided to do a project with it which will show some of its capabilities. Blip is a development board for Bluetooth Low Energy (BLE) and 802.15.4 based wireless applications, based on the Nordic Semiconductor nRF52840. GETTING STARTED WITH THE ATMEL ATTINY84 MICROCONTROLLERATTINY84 DATASHEETATTINY84 I2CATTINY84 I2CATTINY84 PROJECTS If you liked this article, please consider supporting my efforts by purchasing my book. Python Playground, published by No Starch Press, USA, is a collection of imaginative programming projects that will inspire you to use Python to make art and music, build simulations of real-world phenomena, and interact with hardware like the Arduino andRaspberry Pi.
GETTING STARTED WITH STM32 ARM CORTEX-M3 USING GCCARM GCC TOOLCHAINCLANG GCC TOOLCHAIN AN2586 Application note – Getting started with STM32F10xxx hardware development. (1) above gives an overview of the chip whereas (2) goes into details – setting up registers and programming the chip. (3) is a handy reference for the Nucleo board, and (4) is helpful when you are designing your own PCB with the chip. GETTING STARTED WITH ATTINY85 (AVR PROGRAMMING) · ELECTRONUT Getting started with ATtiny85 (AVR Programming) 30 Apr 2014. I just got the batch of ATtiny85s I ordered for some pals at a local Maker group. I have articles here on ATtiny84, but not on this chip.So here are some quick notes on getting started with the ATtiny85. A SIMPLE IOT PROJECT WITH THE ESP8266 WIFI MODULE · ELECTRONUTESP8266 MODULE SETUPESP8266 NODEMCU ESP8266 MODULEESP8266 12EESP8266 ARDUINO PROJECTSNODEMCU ESP8266 PROJECTSESP8266 MODULE ARDUINO The ESP8266 WiFi Module. The ESP8266 is a WiFi module that costs less than 5 USD. This makes putting your sensors on the net actually feasible. (Hooking up the $75 Arduino Yun to each of your sensors – not no feasible.) There’s a lot of excitement about this sensor on the Internet currently, and people have done an amazing jobdeciphering
TEMPERATURE/ALTITUDE/PRESSURE DISPLAY USING BMP180 gotten around to building a display around it. This project uses an Arduino Pro Mini 3.3 V clone, a BMP180 sensor and a. Nokia 5110 LCD module to display the current temperature, altitude and. pressure. Here is the schematic for the project: The circuit INSTALLING ARDUINO BOOTLOADER ON AN ATMEGA32U4 · ELECTRONUTARDUINO LEONARDO ATMEGA32U4ARDUINO ATMEGA32U4ARDUINO 32U4 JOYSTICK Installing Arduino Bootloader on an ATmega32u4 06 Jun 2015. The Atmel ATmega32u4 gained popularity with its use in the Arduino Leonardo, due to the built-in USB support, which made an additional chip unnessaryfor that purpose.
ATMEGA168 POWER SAVE MODE AND PIN CHANGE INTERRUPT So here, we will be using the “power-save” mode from the above table, and use a pin-change interrupt to wake up from this sleep mode. The setup used is shown below in the 2 schematics I had posted before. The output Vo from the op-amp should be connected to the pin 14 of the ATmega168 (PCINT0/PB0). Also, in this case, we are not using EXTERNAL NRF51822 SWD PROGRAMMING USING THE NRF51-DKSEE MORE ONELECTRONUT.IN
PLOTTING DHT11 SENSOR DATA AT THINGSPEAK.COM USINGSEE MORE ONELECTRONUT.IN
ELECTRONUT · PROGRAMMING & EMBEDDED SYSTEMS Vibration Analysis with Blip nRF52840. In the midst of launching our crowd supply campaign for nRF52840 based board Blip, we decided to do a project with it which will show some of its capabilities. Blip is a development board for Bluetooth Low Energy (BLE) and 802.15.4 based wireless applications, based on the Nordic Semiconductor nRF52840. GETTING STARTED WITH THE ATMEL ATTINY84 MICROCONTROLLERATTINY84 DATASHEETATTINY84 I2CATTINY84 I2CATTINY84 PROJECTS If you liked this article, please consider supporting my efforts by purchasing my book. Python Playground, published by No Starch Press, USA, is a collection of imaginative programming projects that will inspire you to use Python to make art and music, build simulations of real-world phenomena, and interact with hardware like the Arduino andRaspberry Pi.
GETTING STARTED WITH STM32 ARM CORTEX-M3 USING GCCARM GCC TOOLCHAINCLANG GCC TOOLCHAIN AN2586 Application note – Getting started with STM32F10xxx hardware development. (1) above gives an overview of the chip whereas (2) goes into details – setting up registers and programming the chip. (3) is a handy reference for the Nucleo board, and (4) is helpful when you are designing your own PCB with the chip. GETTING STARTED WITH ATTINY85 (AVR PROGRAMMING) · ELECTRONUT Getting started with ATtiny85 (AVR Programming) 30 Apr 2014. I just got the batch of ATtiny85s I ordered for some pals at a local Maker group. I have articles here on ATtiny84, but not on this chip.So here are some quick notes on getting started with the ATtiny85. A SIMPLE IOT PROJECT WITH THE ESP8266 WIFI MODULE · ELECTRONUTESP8266 MODULE SETUPESP8266 NODEMCU ESP8266 MODULEESP8266 12EESP8266 ARDUINO PROJECTSNODEMCU ESP8266 PROJECTSESP8266 MODULE ARDUINO The ESP8266 WiFi Module. The ESP8266 is a WiFi module that costs less than 5 USD. This makes putting your sensors on the net actually feasible. (Hooking up the $75 Arduino Yun to each of your sensors – not no feasible.) There’s a lot of excitement about this sensor on the Internet currently, and people have done an amazing jobdeciphering
TEMPERATURE/ALTITUDE/PRESSURE DISPLAY USING BMP180 gotten around to building a display around it. This project uses an Arduino Pro Mini 3.3 V clone, a BMP180 sensor and a. Nokia 5110 LCD module to display the current temperature, altitude and. pressure. Here is the schematic for the project: The circuit INSTALLING ARDUINO BOOTLOADER ON AN ATMEGA32U4 · ELECTRONUTARDUINO LEONARDO ATMEGA32U4ARDUINO ATMEGA32U4ARDUINO 32U4 JOYSTICK Installing Arduino Bootloader on an ATmega32u4 06 Jun 2015. The Atmel ATmega32u4 gained popularity with its use in the Arduino Leonardo, due to the built-in USB support, which made an additional chip unnessaryfor that purpose.
ATMEGA168 POWER SAVE MODE AND PIN CHANGE INTERRUPT So here, we will be using the “power-save” mode from the above table, and use a pin-change interrupt to wake up from this sleep mode. The setup used is shown below in the 2 schematics I had posted before. The output Vo from the op-amp should be connected to the pin 14 of the ATmega168 (PCINT0/PB0). Also, in this case, we are not using EXTERNAL NRF51822 SWD PROGRAMMING USING THE NRF51-DKSEE MORE ONELECTRONUT.IN
PLOTTING DHT11 SENSOR DATA AT THINGSPEAK.COM USINGSEE MORE ONELECTRONUT.IN
ABOUT · ELECTRONUT
About. electronut is a culmination of my interests in programming and embedded systems. I started writing about my experiments with embedded hardware in 2010, and in 2015, No Starch Press published my book Python Playground.. From 2016 to 2019 I ran a small consulting firm called Electronut Labs. GETTING STARTED WITH STM32 ARM CORTEX-M3 USING GCC AN2586 Application note – Getting started with STM32F10xxx hardware development. (1) above gives an overview of the chip whereas (2) goes into details – setting up registers and programming the chip. (3) is a handy reference for the Nucleo board, and (4) is helpful when you are designing your own PCB with the chip.BLUEY BEACON
Bluey Beacon - Building a Nordic nRF52832 BLE IoT Sensor Beacon 09 Jul 2017. A BLE Beacon. In this project, we’re going to build a BLE Beacon that transmits temperature, humidity and ambient light levels to a dashboard on the internet. GETTING STARTED WITH ATMEL ATTINY10 · ELECTRONUT The Code. The first thing you want to set is the clock speed. The ATtiny10 doesn’t have any fuses related to that, so you need to set that in the CLKPS register. The default is a prescaler of 8 which puts it at 1 MHz, but we want to run it at 8 MHz. // Set CPU speed by setting clock prescalar: GETTING STARTED WITH ZEPHYR RTOS ON NORDIC NRF52832 Getting Started with Zephyr RTOS on Nordic nRF52832 hackaBLE 21 Feb 2019 Introduction. I worked for almost two decades in the software industry. In the early 2000s, I was developing applications on Windows, Linux, and various flavours of Unix. PLOTTING ALGORITHMIC TIME COMPLEXITY OF A FUNCTION USING Plotting Algorithmic Time Complexity of a Function using Python 18 Jul 2014. I have been reading Miller & Ranum's e-book on Python/Algorithms. (A superb book which is also free online.) While looking through their chapter on Algorithm Analysis, I took their idea of using the Python Timer and timeit methods a bit forward to create a simple plotting scheme using matplotlib. SIMPLE AUDIO RECOGNITION ON A RASPBERRY PI USING MACHINE In the above code, get_spectrogram is a function that is mapped over a TensorFlow DataSet to compute the spectrogram from the normalised audio data. In the original code, the STFT was computed using the TensorFlow tf.signal.stft function. But here’s the problem – PLAYING WITH THREAD AND MQTT-SN ON NORDIC NRF52840 Playing with Thread and MQTT-SN on Nordic nRF52840 11 Aug 2018 Introduction. IoT is in the air. Impossible to surf the web in peace without tripping over some gushy article on billions of devices connecting to the Internet. NORDIC NRF52840 QR CODE BASED THREAD COMMISSIONING Nordic nRF52840 QR Code based Thread Commissioning 15 Aug 2018 Introduction. I recently wrote about using Thread and MQTT-SN on the Nordic nRF52840 multiprotocol SoC. One thing I did not cover in detail is Thread Commisioning - a secure process by which a device joins a Thread network. I side-stepped the process by passing the network credentials directly to the device using theELECTRONUT LABS
Electronut Labs B o ar d d i m e ns i o ns R e f e r e nc e s : 1. Getting started guide for Blip - h ttps://docs.electronut.in/blip/Skip to content
* Blog
* __Docs
* Code __
* __Github
* __Gitlab
* About
* Blog
* __Docs
* Code
* __Github
* __Gitlab
* About
BLOG
*
*
*
EASY WORKFLOW FOR USING UIO (LINUX) TO ACCESS IP ON XILINX ZYNQ If like me, you're a newbie to FPGAs, and SoC FPGAs from Xilinx, the complexity of running an application talking to your IP from Linux can be quite daunting. I started by using petalinux from Xilinx to try and use an IP that I made using Vivado HLS (C toBy Tavish Naruka
|2019-09-24T11:30:10+05:30September17th, 2019|
*
*
*
VIBRATION ANALYSIS WITH BLIP NRF52840 In the midst of launching our crowd supply campaign for nRF52840 based board Blip, we decided to do a project with it which will show some of its capabilities. Blip is a development board for Bluetooth Low Energy (BLE) and 802.15.4 based wireless applications, based on the Nordic Semiconductor nRF52840By Vaishali Pathak
|2019-09-19T17:25:22+05:30August23rd, 2019|
*
*
*
CONTROLLING AN RGB LED MATRIX VIA WEB BLUETOOTH ON BLIP NRF52840 DEVBOARD
In the coming months, we are planning to launch our new nRF52840 based development board named Blip. I thought it would be interesting to do something visually and use Web Bluetooth in the process. For peoples who are curious about what blip is, It is a development board forBluetooth
By Ajay Meena
|2019-09-19T17:47:41+05:30May29th, 2019|
*
*
*
ICE BLING FPGA – BEAUTIFUL LED EARRINGS WITH LATTICE ICE40 iCE Bling It's the same story every year. At the horizon is a loved one's birthday, or an anniversary, and I want to make them something special. Buying something won't do. Oh no, I have to design and build it myself. I would then start with a simple idea, and By Mahesh Venkitachalam |2019-09-23T15:04:38+05:30May22nd, 2019|
*
*
*
DEVELOPING MOBILE APPS FOR BLE DEVICES Developing a BLE application requires a lot of domain specific knowledge. You need to learn a lot of languages that target specific platforms. Eg. Java or Kotlin for Android Native Application development, or Objective C or Swift for IOS development. Moreover, you need to be proficient in the tools, likeBy Arun Yadav
|2019-09-19T17:28:22+05:30May16th, 2019|
*
*
*
GETTING STARTED WITH ZEPHYR RTOS ON NORDIC NRF52832 HACKABLE Introduction I worked for almost two decades in the software industry. In the early 2000s, I was developing applications on Windows, Linux, and various flavours of Unix. On the Windows side, we had Microsoft Visual Studio, MFC, NMake, and CL. On the Linux/Unix side, we had GCC,POSIX and various
By Mahesh Venkitachalam |2019-06-26T05:48:41+05:30February21st, 2019|
*
*
*
HOW TO USE HACKABLE WITH ARDUINO IDE If you are planning to buy a Bluetooth Low Energy (BLE) board or want to incorporate BLE functionality in your product, then hackaBLE could be a great candidate for the job! hackaBLE is a tiny Open Source Nordic nRF52832 based BLE development board developed by ElectronutLabs that you can
By Vaishali Pathak
|2019-09-24T19:05:57+05:30January28th, 2019|
*
*
*
CREATING QUICK GPS TRACKING DEVICE WITH NRF52840 BLIP Last weekend, my colleagues and I decided to go on a trek to Kudremukh peak in the Western Ghats. We thought, how about recording the GPS data throughout the trek. We quickly assembled a GPS module with our upcoming board blip, which is a development board based on Nordic'snRF52840
By Vaishali Pathak
|2019-09-23T18:21:19+05:30December14th, 2018|
*
*
*
BARE METAL ARM PROGRAMMING ON NORDIC NRF5 BLE SOCS This post will have enough information to help someone understand the startup code and all the intermediate files present in a bare metal C project for a microcontroller. This will be explained through a minimal blinky example for nRF52832, that pulls no external dependencies. Over here at Electronut Labs, weBy Tavish Naruka
|2019-09-22T21:56:07+05:30September10th, 2018|
12 Next
� Copyright 2020 | Electronut Labs Pvt Ltd – All rightsreserved
Twitter Youtube
Go to Top
Details
5